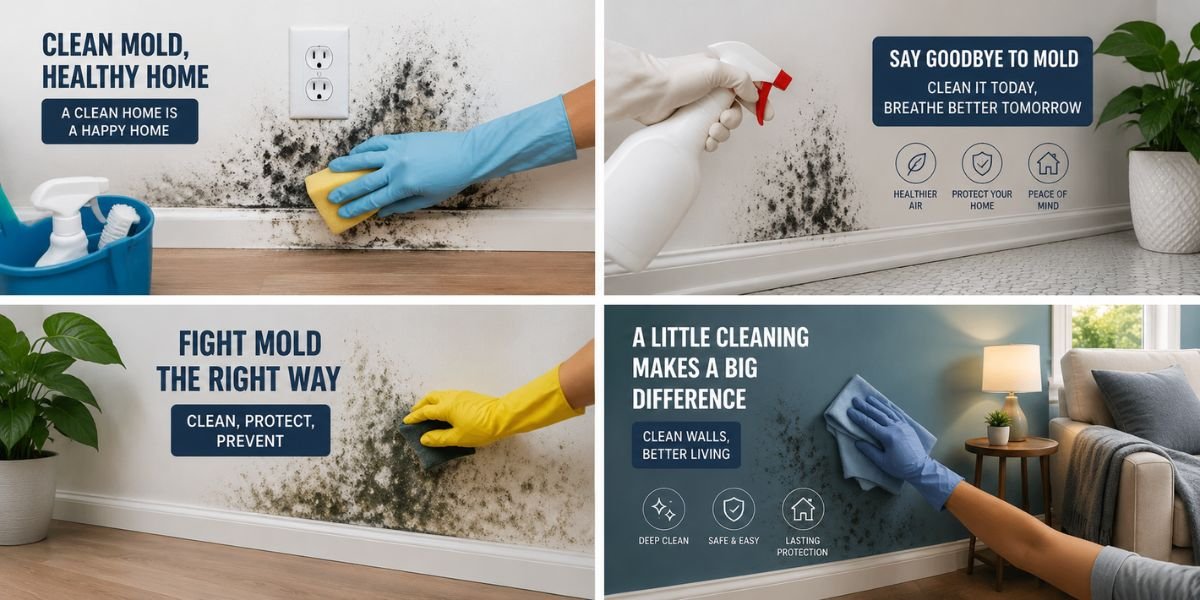
I still remember walking into a client’s finished basement a few years back. She’d painted over a faint gray patch on the drywall twice, thinking it was just a stain from the previous owners. By the time she called me, the mold had spread behind the baseboards and eaten into the paper backing of two full sheets of drywall. What could’ve been a $50 weekend fix turned into a $1,800 tear-out job.
That’s the thing about mold on walls — it rarely announces itself loudly at first, but it never stays small either. If you’re dealing with spots, discoloration, or that musty smell that won’t go away, you’re in the right place. This guide walks through exactly how to remove mold from walls the right way, whether you’re tackling a small patch yourself or trying to figure out when it’s time to call in a pro.
Quick Answer
For small mold patches (less than 10 square feet) on non-porous or lightly porous surfaces, you can usually remove mold yourself using a solution of water and detergent, or a diluted bleach/vinegar mix, followed by thorough drying and a mold-inhibiting primer. For larger infestations, mold behind walls, or mold caused by ongoing moisture problems (like a roof leak or plumbing issue), you’ll want a mold remediation professional — because scrubbing the surface won’t fix a hidden moisture source, and the mold will just come back.
What It Is (and Why It Shows Up on Walls)
Mold is a fungus that reproduces through airborne spores, and those spores are basically everywhere — indoors and outdoors. The spores only become a problem when they land somewhere with three things: moisture, an organic food source (drywall paper, wood framing, dust, wallpaper paste), and a temperature between about 40 and 100°F. Most homes hit that range year-round.
On walls specifically, mold usually shows up because of:
- A slow plumbing leak inside the wall cavity
- Poor exterior drainage pushing water toward the foundation
- Condensation from a missing or damaged vapor barrier
- High indoor humidity with no ventilation (common in bathrooms and basements)
- Roofing leaks that travel down through wall framing
If you’re only treating the surface and ignoring the moisture source, you’re not solving the problem — you’re just buying time.
Is It Mold or Something Else?
Homeowners often confuse mold with mildew, efflorescence, or dirt. Here’s a quick way to tell them apart:
- Mold is usually fuzzy, black, green, or dark gray, and grows in irregular patches.
- Mildew is more of a surface issue, powdery, and lighter in color (white or gray).
- Efflorescence is a white, chalky, salt-like deposit that shows up on concrete or masonry walls — it’s mineral, not biological, and means water is moving through the material.
A simple test: dab a little diluted bleach on the spot. If it lightens significantly within a couple minutes, it’s likely mold or mildew. If nothing changes, you’re probably looking at efflorescence or dirt, which needs a different fix entirely.
Materials Needed
- N95 respirator mask (not a basic dust mask)
- Rubber gloves and safety goggles
- Plastic sheeting for containment
- Stiff-bristle scrub brush
- Spray bottle
- Cleaning solution (see options below)
- Clean rags or disposable paper towels
- Fan or dehumidifier
- Mold-resistant primer and paint
- HEPA vacuum (if available)
Cleaning Solution Options
Budget option: Dish soap and water — works on light surface mold on painted drywall.
Mid-range option: A solution of 1 cup bleach to 1 gallon of water. Effective on non-porous surfaces like tile, tub surrounds, and painted trim, but bleach doesn’t penetrate porous materials like drywall or wood well, so it’s not ideal for those.
Preferred option for porous surfaces: White vinegar (undiluted) or a commercial mold-killing product labeled for porous surfaces (containing borax or hydrogen peroxide-based formulas). These penetrate deeper and are generally safer to use indoors without harsh fumes.
Whatever you choose, never mix bleach with ammonia-based cleaners — it produces toxic fumes.
Step-by-Step Guide: Removing Mold from Walls
Skill Level: Beginner to intermediate Estimated Time: 1–3 hours for a small patch; a full day or more if drywall needs to be cut out and replaced Tools Required: Listed above
Step 1: Contain the Area
Close doors, turn off HVAC vents in the room, and tape up plastic sheeting if the patch is larger than a dinner plate. This keeps spores from spreading to the rest of the house while you’re disturbing them.
Step 2: Protect Yourself
Put on your respirator, gloves, and goggles before you touch anything. Mold spores are lightweight and easily inhaled, and repeated exposure can trigger allergic reactions or respiratory irritation, especially for people with asthma or compromised immune systems.
Step 3: Test the Surface
Press gently on the drywall around the moldy area. If it feels soft, spongy, or crumbles, the moisture has compromised the material and you’re looking at a cut-out-and-replace job, not a clean-and-paint job.
Step 4: Apply Your Cleaning Solution
Spray the affected area generously and let it sit for 10–15 minutes. Don’t scrub immediately — giving the solution time to break down the mold makes the job easier and reduces how much you’re disturbing spores into the air.
Step 5: Scrub Thoroughly
Use a stiff brush to work the solution into the texture of the wall. For painted drywall, be firm but avoid gouging the paper surface underneath the paint.
Step 6: Wipe and Dry Completely
Wipe down with clean rags, then run a fan or dehumidifier on the area for at least 24–48 hours. This step gets skipped constantly, and it’s the reason mold comes right back — surfaces need to be bone dry before you prime or paint.
Step 7: Prime with a Mold-Inhibiting Primer
Once fully dry, apply a stain-blocking, mold-resistant primer (products like Kilz Mold & Mildew or Zinsser’s mold-resistant line work well). This seals in any residual staining and creates a less hospitable surface for future growth.
Step 8: Repaint
Finish with a mold-resistant paint, especially in bathrooms, laundry rooms, or basements where humidity runs high.
When Drywall Has to Come Out
If mold has penetrated the paper backing or the drywall is soft, sagging, or has spread more than about 10 square feet, cutting out and replacing the affected section is the right call. Here’s the general process:
- Cut out the moldy drywall section with a utility knife or drywall saw, extending at least 12 inches beyond visible mold.
- Inspect the wall cavity, framing, and insulation behind it — moldy insulation or a compromised vapor barrier needs to be removed and replaced too.
- Treat the exposed framing with a mold-killing solution and let it dry completely.
- Fix the moisture source before closing the wall back up (this is non-negotiable).
- Install new insulation if needed, then patch with new drywall, tape, mud, prime, and paint.
This is where a lot of DIYers get in over their heads, particularly if the mold is near electrical wiring or the wall is load-bearing. If you’re unsure about structural framing or you find signs of rot in the studs, that’s your cue to bring in a contractor.
Common Mistakes Homeowners Make
- Painting over mold instead of removing it. Paint doesn’t kill mold — it just hides it temporarily while it keeps eating away underneath.
- Skipping the drying step. Sealing in moisture with primer creates the perfect conditions for regrowth.
- Using bleach on porous materials and expecting deep results. Bleach is great for tile and grout, but it mostly just bleaches the surface of drywall and wood without killing the roots.
- Ignoring the moisture source. Mold is a symptom. If you don’t fix the leak, gap in the vapor barrier, or ventilation issue, you’ll be back here again in six months.
- Not testing for asbestos in older homes. If your home was built before 1980 and you’re cutting into walls, it’s worth having materials tested before demo work begins.
Cost Breakdown
Costs vary quite a bit depending on your region, labor rates, and the extent of the problem, but here’s a general range:
- DIY small patch (under 10 sq ft): $20–$75 for cleaning supplies, primer, and paint
- DIY drywall replacement (small section): $100–$300 in materials
- Professional mold remediation (small to moderate job): $500–$1,500
- Professional remediation with drywall/insulation replacement: $1,500–$5,000+
- Large-scale remediation involving structural repair: $5,000–$15,000 or more
Keep in mind that costs can differ significantly based on your location, the extent of hidden damage, whether asbestos or lead testing is required, and local permit requirements for structural repairs.
Professional vs DIY: How to Decide
DIY makes sense when the mold patch is small, on a non-porous or easily cleaned surface, and you can clearly identify and fix the moisture source yourself (like wiping down a bathroom wall after fixing a caulking gap).
Call a professional when:
- The affected area is larger than about 10 square feet
- Mold keeps returning after cleaning
- You smell mold but can’t see where it’s coming from
- The wall feels soft, warped, or damaged
- Anyone in the household has respiratory conditions or a compromised immune system
- You suspect the mold is tied to a bigger issue like a roof leak or foundation crack
For guidance on health risks and when remediation should be handled professionally, the <cite index=”0-1″>EPA recommends that mold and moisture problems be addressed and the mold removed</cite>, and their official mold resource page is a solid reference if you want to understand exposure risks in more detail.
Safety Considerations
- Always wear a properly rated respirator (N95 or better) — a paper dust mask won’t cut it.
- Ventilate the space, but don’t run central HVAC while working, since it can spread spores throughout the house.
- If you have asthma, allergies, or a compromised immune system, it’s worth having someone else handle mold cleanup, or at least stepping out during active demo work.
- Never mix bleach with ammonia or other cleaning chemicals.
- If mold covers a large area or you’re dealing with black mold in an HVAC system, treat it as a job for licensed remediation specialists, not a weekend project.
Maintenance Tips to Prevent Mold From Coming Back
- Run a dehumidifier in basements or humid climates, keeping indoor humidity below 50%.
- Make sure bathroom and kitchen exhaust fans vent outside, not into the attic.
- Check caulking around tubs, showers, and windows twice a year and reseal as needed.
- Keep gutters clean and grade soil away from the foundation to prevent water intrusion.
- Address any drywall or ceiling stains immediately rather than waiting to see if they “go away.”
If moisture control is an ongoing concern in your home, our guide on preventing moisture buildup in basements and crawl spaces covers ventilation, vapor barriers, and drainage solutions in more depth.
Expert Recommendations
After years of walking into homes with mold complaints, the pattern is almost always the same: the mold itself isn’t the real problem, the trapped moisture is. Before you spend money on cleaning products or hire someone to tear out drywall, invest in figuring out where the water is coming from. A $15 moisture meter or a simple visual inspection during a rainstorm can save you thousands in repeat repairs.
Final Thoughts
Removing mold from walls isn’t complicated once you understand the process: contain the area, clean thoroughly, dry it out completely, and seal with the right products. But the real work — and the part that actually prevents this from becoming a recurring headache — is tracking down and fixing whatever’s feeding that moisture in the first place. Handle small patches yourself with the right precautions, and don’t hesitate to bring in a remediation professional once you’re dealing with hidden mold, structural concerns, or a health-sensitive household. Either way, don’t wait on it. Mold problems get more expensive the longer they sit.
FAQs
Can I remove mold from walls with just vinegar? Yes, for small, surface-level mold on painted drywall or wood, undiluted white vinegar is effective and safer than bleach for porous materials. It won’t work well on extensive infestations or mold that has penetrated deep into the material.
Does bleach kill mold permanently? Bleach kills surface mold effectively on non-porous materials like tile and glass, but on porous materials like drywall and wood, it often only bleaches the visible color while the mold roots remain beneath the surface.
How do I know if mold is inside my walls and not just on the surface? Signs include a persistent musty odor with no visible source, soft or bubbling drywall, discoloration that keeps returning after cleaning, and increased allergy symptoms indoors. A moisture meter or infrared camera can help confirm hidden mold without cutting into the wall.
Is black mold more dangerous than other types? “Black mold” often refers to Stachybotrys chartarum, which can produce mycotoxins in some conditions. However, all mold types can cause health issues for sensitive individuals, so the color alone shouldn’t determine your level of concern — the extent of growth and your household’s health sensitivities matter more.
How long does it take to get rid of mold on walls? A small DIY cleanup can be done in a few hours, including drying time. Professional remediation for moderate to large infestations typically takes 1–5 days, depending on how much material needs to be removed, dried, or replaced.
Will homeowners insurance cover mold removal? It depends on the cause. Most policies cover mold removal if it results from a sudden, covered event like a burst pipe, but they typically exclude mold caused by long-term neglect, such as an unaddressed roof leak or chronic humidity issues.
Do I need a permit to remove moldy drywall? Simple drywall patching usually doesn’t require a permit. However, if the repair involves structural framing, electrical work, or a significant portion of a wall, check with your local building department, since permit requirements vary by municipality.
Can mold come back after professional remediation? Yes, if the underlying moisture source isn’t fixed. Professional remediation should always include identifying and correcting the cause of moisture, not just removing the visible mold.