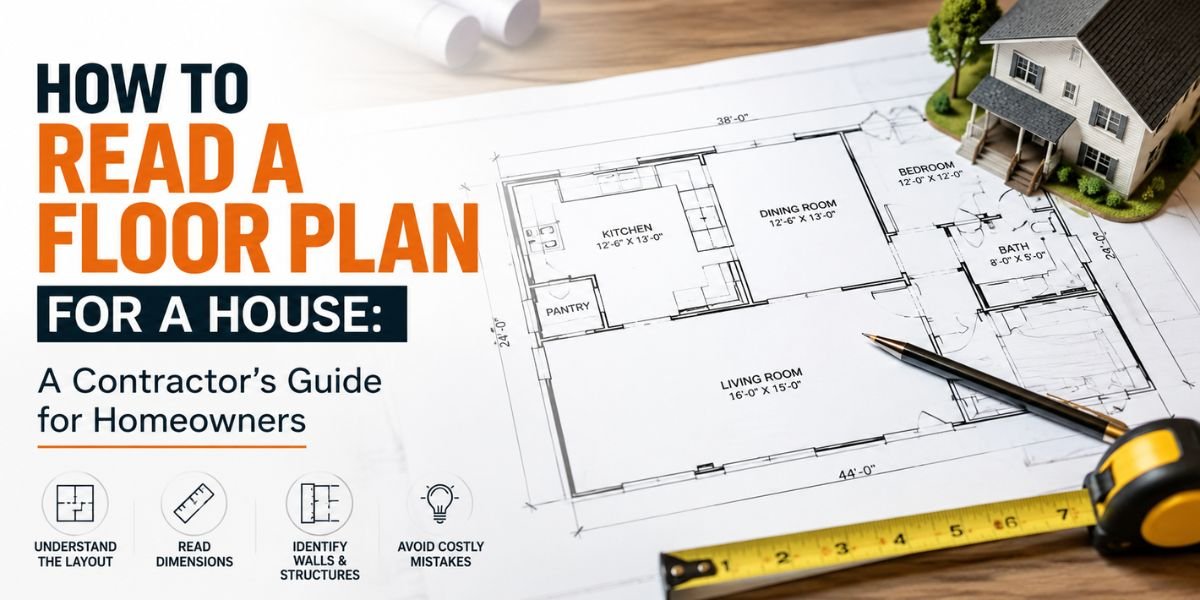
I still remember standing in a client’s kitchen a few years back while she pointed at a rolled-up blueprint and said, “I signed off on this, but honestly, I have no idea what half these lines mean.” She’d approved a floor plan for a $40,000 kitchen and living room renovation without fully understanding where the load-bearing wall was going to end up relative to her pantry. We caught it before construction started, but it easily could have gone the other way.
That conversation is more common than you’d think. Whether you’re buying a new home, planning a renovation, or building from scratch, learning how to read a floor plan for a house is one of the most valuable skills you can pick up as a homeowner. It’s the difference between confidently reviewing your architect’s drawings and just nodding along hoping for the best.
Whether you’re buying a new home, planning a renovation, or building from scratch, learning how to read a floor plan for a house is one of the most valuable skills you can pick up as a homeowner. If you’re deciding between different home layouts, our guide to Open Floor Plans vs Traditional Layouts explains how various floor plan styles affect everyday living.
Quick Answer
A floor plan is a scaled, top-down drawing of a building’s layout, showing walls, doors, windows, room dimensions, and fixtures as if you sliced the house horizontally and looked down from above. To read one, start by identifying the scale (usually noted as something like 1/4 inch = 1 foot), then locate the compass orientation, walls (thick lines are usually load-bearing or exterior, thin lines are interior partitions), door swings, window placements, and symbols for plumbing, electrical, and HVAC. Most residential plans also include room labels and square footage. Once you understand these basic elements, you can visualize how the actual space will feel and function.
What a Floor Plan Actually Is
A floor plan is essentially a bird’s-eye-view map of your home. Architects and designers draw it as if the roof has been lifted off and you’re looking straight down at the layout. Every floor plan is drawn to scale, meaning the proportions on paper match real-world measurements — just shrunk down.
Residential floor plans typically show:
- Exterior and interior walls
- Room layouts and labels (bedroom, kitchen, bathroom, etc.)
- Doors and window placements, including swing direction
- Stairs, closets, and built-ins
- Dimensions for rooms and overall square footage
- Fixtures like sinks, toilets, and sometimes appliances
If you’re working with a full architectural set, you’ll also get separate sheets for electrical, plumbing, and foundation plans — but the floor plan is your starting point for understanding the overall layout.
Why This Matters for Homeowners
I’ve seen plenty of good renovation budgets get wasted because a homeowner approved a plan without truly understanding it. Maybe they didn’t realize a wall was structural, or they didn’t catch that the new bathroom door would swing directly into the vanity.
Learning to read floor plans helps you:
- Catch design flaws before construction starts (way cheaper to fix on paper than in drywall)
- Communicate more effectively with your contractor or architect
- Evaluate a home you’re considering buying
- Plan furniture layout and traffic flow ahead of time
- Understand where structural support, plumbing lines, and electrical runs are located
Understanding Scale and Measurements
The first thing I tell clients to look for is the scale notation, usually printed near the title block in a corner of the sheet. Common residential scales are 1/4″ = 1′-0″ or 1/8″ = 1′-0″. This tells you that every quarter inch on paper equals one actual foot in the house.
If a bedroom on the plan measures 3 inches by 3 inches at a 1/4″ scale, that’s a 12-foot by 12-foot room in real life. Most plans also include printed dimension lines with actual measurements, so you often don’t need to do the math yourself — but knowing how scale works helps you double-check things.
Reading Wall Types and Symbols
This is where a lot of confusion happens, and it’s honestly the most important part for anyone planning a renovation.
Wall thickness matters. Thicker lines usually represent exterior walls or load-bearing walls — these carry structural weight from the roof or upper floors down to the foundation. Thinner lines typically represent interior partition walls, which just divide space and generally aren’t holding anything up.
That said, don’t assume based on line thickness alone. Some plans use hatching (diagonal lines) or shading to distinguish structural walls. If you’re planning to remove or modify any wall, always confirm with a structural engineer or your contractor — guessing wrong here can compromise your entire structure.
Other symbols you’ll commonly see:
- Doors — shown as a line with an arc indicating swing direction
- Windows — usually a break in the wall line with parallel lines
- Stairs — represented with a series of parallel lines and an arrow showing direction of travel (up or down)
- Plumbing fixtures — standardized symbols for toilets, sinks, tubs, and showers
- Electrical — outlets, switches, and light fixtures often use small circles or specific icons, though these are more detailed on a separate electrical plan
Orientation and Compass Direction
Most floor plans include a small compass symbol (often just an arrow marked “N”) somewhere on the sheet. This tells you which direction the house faces. It matters more than people realize — north-facing rooms get less direct sunlight, while south-facing rooms (in the Northern Hemisphere) tend to be brighter and warmer throughout the day. If you’re planning where to put a home office or a plant-filled sunroom, this detail is worth paying attention to.
Step-by-Step Guide to Reading a Floor Plan
Step 1: Find the title block and scale. This tells you what you’re looking at and how to interpret measurements.
Step 2: Identify the compass orientation. Know which way the house faces.
Step 3: Trace the exterior walls first. This gives you the overall footprint and shape of the home.
Step 4: Identify load-bearing vs. partition walls. Look at line weight and check for a structural or foundation plan if one’s included.
Step 5: Locate entry points. Find the front door, back door, and garage entry to understand traffic flow.
Step 6: Walk through each room mentally. Follow the layout room by room — kitchen, living areas, bedrooms, bathrooms — and note how they connect.
Step 7: Check door swings and clearances. Make sure doors won’t collide with furniture, appliances, or each other.
Step 8: Review fixture placement. Confirm where sinks, toilets, and major appliances will sit, especially relative to plumbing and electrical.
Step 9: Cross-reference dimensions. Compare printed dimensions against your expectations for furniture and usable space.
Step 10: Ask questions. If anything is unclear, ask your architect, designer, or contractor before construction begins. This step alone saves more money than anything else on this list.
Common Mistakes Homeowners Make Reading Floor Plans
- Assuming all walls are removable. Not checking with a professional before requesting a wall removal is one of the most expensive mistakes I see.
- Ignoring door swing conflicts. A door that swings into another door or blocks a cabinet is a daily annoyance that’s easy to miss on paper.
- Overlooking scale distortion. Viewing a plan on a phone screen or a poorly scaled printout can throw off your sense of actual room size.
- Skipping the electrical and plumbing plans. The floor plan alone won’t tell you everything — outlet placement and plumbing runs are usually on separate sheets.
- Not accounting for furniture clearance. A room might look spacious on paper but feel cramped once you add real furniture with walking space around it.
Professional vs. DIY Interpretation
If you’re just trying to understand a plan for personal purposes — buying a home, planning furniture, general curiosity — learning the basics yourself is completely doable, and this guide covers what you need.
However, if you’re planning any structural changes, like removing a wall, adding a room, or altering the foundation footprint, you need a licensed architect, structural engineer, or experienced contractor involved. Building codes and permit requirements vary significantly by location, and a wrong assumption about a load-bearing wall can lead to serious structural issues, not to mention potential code violations that can hold up your permits.
Tools That Help
You don’t need fancy software to get started, but a few tools make the process easier:
- A basic architect’s scale ruler — inexpensive and lets you measure directly off printed plans
- Free floor plan apps — many let you upload or sketch plans and get automatic measurements
- Graph paper — old school, but great for sketching your own furniture layout ideas over a printed plan
- PDF markup tools — useful for annotating digital plans with questions for your contractor
Safety and Structural Considerations
I can’t stress this enough: floor plans give you visual information, but they don’t replace professional structural assessment. If your renovation involves any of the following, bring in a licensed professional before moving forward:
- Removing or altering a load-bearing wall
- Changing the foundation or slab footprint
- Modifying roof framing
- Rerouting major plumbing or HVAC lines
- Any structural work requiring a permit in your municipality
Permit requirements differ by city and county, so always check with your local building department before starting structural work — this isn’t something to guess on. For a broader understanding of how permits factor into renovation timelines, our complete guide to home renovation permits walks through the process in more detail.
Expert Recommendations
After years of walking clients through blueprints on job sites, here’s what I always tell people:
- Don’t be afraid to ask your architect or contractor to walk you through the plan verbally — a five-minute conversation can clear up confusion that would take hours to figure out alone.
- Print plans at full scale when possible, rather than relying only on a screen, especially before finalizing furniture placement.
- Always double-check load-bearing wall locations with a structural professional — never assume based on the drawing alone.
- If you’re buying a home, request the floor plan and compare it to the actual space during your walkthrough. Discrepancies do happen.
- Keep a copy of your final approved floor plan for future renovations, insurance documentation, or resale purposes.
For homeowners wanting a deeper technical reference on interpreting architectural symbols, the American Institute of Architects publishes standardized guidance on drawing conventions used across the industry.
Conclusion
Reading a floor plan doesn’t require an architecture degree — it just requires knowing what to look for. Once you understand scale, wall types, symbols, and orientation, you’ll be able to walk through a set of plans with confidence, catch potential issues early, and make informed decisions about your home. Whether you’re renovating, building new, or simply house hunting, this skill pays for itself the first time it helps you avoid a costly mistake.
If you’re about to start a renovation project, take the time to sit down with your contractor or architect and go through the plan line by line. It’s a small time investment that can save you real money and headaches down the road.
FAQs
1. What do thick lines mean on a floor plan?
Thick lines typically represent exterior walls or load-bearing walls that provide structural support. However, this isn’t universal across all drafters, so always confirm with a professional before making structural changes.
2. How do I know if a wall is load-bearing just from the floor plan?
You generally can’t confirm this with 100% certainty from the floor plan alone. Line weight and hatching can be indicators, but a structural engineer or experienced contractor should verify before any wall is altered.
3. What does the scale on a floor plan mean?
The scale tells you the ratio between the drawing and real-world measurements. A common residential scale is 1/4 inch = 1 foot, meaning every quarter inch on paper equals one foot in the actual house.
4. Why is compass orientation included on floor plans?
It shows which direction the house faces, which affects natural light, room warmth, and even landscaping decisions. South-facing rooms typically get more sunlight in the Northern Hemisphere.
5. Can I read a floor plan without any construction background?
Yes. Basic floor plan literacy — understanding scale, walls, doors, and room layout — is accessible to anyone. Structural interpretation, however, should always involve a qualified professional.
6. What’s the difference between a floor plan and a blueprint?
A blueprint is a broader term for a full set of construction drawings, which includes the floor plan along with foundation plans, electrical plans, plumbing plans, and elevations. The floor plan is just one piece of that larger set.
7. Do floor plans show electrical outlets and plumbing?
Sometimes basic outlet and fixture locations appear on the floor plan, but detailed electrical and plumbing layouts are usually found on separate specialized plan sheets.
8. Why does the floor plan matter when buying a home?
It helps you evaluate room sizes, traffic flow, and layout functionality before or during a walkthrough, and lets you compare the advertised layout to the actual physical space.