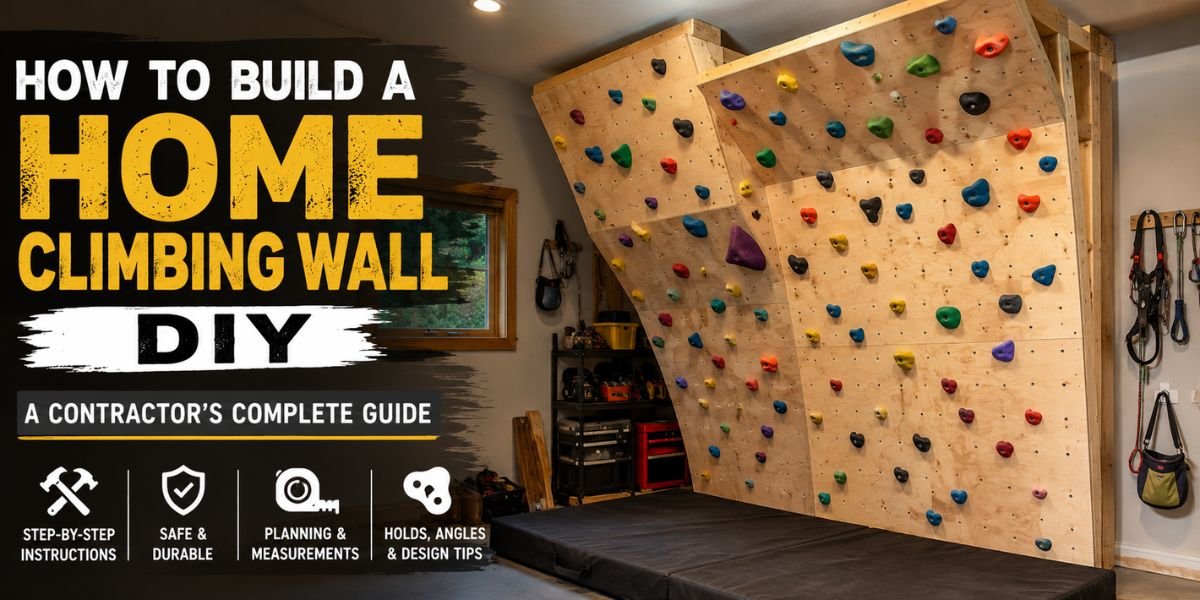
I’ve walked into a lot of garages and basements over the years where a homeowner points at a blank wall and says, “I want to put a climbing wall right there.” Usually it’s a parent trying to burn off a kid’s endless energy, or a climber who’s tired of driving 40 minutes to the nearest gym. Either way, the question that follows is always the same: how to build a home climbing wall DIY without turning it into a structural nightmare or blowing a huge budget.
Here’s the thing — building a climbing wall isn’t complicated carpentry. It’s basically framing a sturdy plywood panel and bolting on holds. But it does need to be done right, because unlike a bookshelf, this thing is going to have a grown adult (or an excited eight-year-old) hanging their full body weight off it. I’ve seen do-it-yourself walls fail because someone used the wrong plywood thickness or skipped finding the studs. That’s the stuff we’re going to fix in this guide.
Quick Answer
To build a home climbing wall, you’ll frame a support structure anchored into wall studs or a freestanding frame, sheath it with 3/4-inch plywood, install T-nuts on a grid pattern (typically 8 inches on center), and bolt on climbing holds. A basic 8×8-foot vertical wall runs $300–$800 in materials for a DIY build, while an angled or overhang wall with a steel frame can run $1,500–$4,000+. Budget a full weekend for a straightforward vertical wall if you’re comfortable with basic framing and drywall/plywood work.
What It Is
A home climbing wall is essentially a reinforced plywood panel — flat, angled, or with an overhang — fitted with hundreds of threaded inserts (T-nuts) that let you bolt on removable climbing holds. Most residential builds fall into three categories:
- Vertical wall — straight up and down, easiest to build, great for beginners and kids
- Angled/slab wall — leans back slightly, more forgiving on the body, good for endurance training
- Overhang wall — leans outward, requires serious structural bracing since the load pulls away from the building, best left to people with solid framing experience
For a first DIY project, I almost always steer homeowners toward a vertical or slightly angled wall. The overhang looks cool in Instagram photos, but the load-bearing math gets a lot less forgiving.
Cost Breakdown
Costs vary quite a bit depending on your region’s material prices, labor rates if you hire help for any part of it, and how elaborate you want to get. Here’s a realistic range based on typical residential builds:
Budget option ($300–$600)
- Basic 8×8 vertical wall
- Standard 3/4″ CDX plywood
- Used or budget climbing holds (bulk sets)
- Framing lumber you may already have on hand
Mid-range option ($700–$1,500)
- Larger wall (10×12 or bigger)
- Baltic birch plywood (smoother, more durable)
- New hold sets with variety (jugs, crimps, slopers)
- Proper T-nuts and hardware, possibly a slight angle/kick
Premium option ($1,800–$4,000+)
- Custom-engineered steel or heavy timber frame
- Adjustable angle sections or a true overhang
- Textured/painted surface, volumes, and premium holds
- Possibly a professional install for the structural frame
Factors that swing your final number: local lumber prices, whether you’re building freestanding versus anchoring into existing framing, the quality and quantity of holds, and whether you need to hire a contractor to confirm your wall or ceiling can handle the load.
Materials Needed
- 3/4-inch plywood (Baltic birch is the gold standard — smoother face, better hold grip, resists splitting around T-nuts)
- 2×4 or 2×6 framing lumber for the support structure
- T-nuts (usually 5/16″ or 3/8″ — match to your hold bolt size)
- Climbing holds (start with 40–60 for a basic wall)
- Lag bolts and structural screws (not standard drywall screws — you need shear strength)
- Wall anchors or ledger board if attaching to an existing wall
- Exterior-grade wood glue
- Level, stud finder, drill/driver, impact driver, circular saw, tape measure
- Safety glasses and work gloves
Tools Required, Skill Level, and Time Estimate
- Skill Level: Intermediate DIY — comfortable with framing, drilling accurately, and reading basic structural layout
- Tools Required: Circular saw, drill/driver, impact driver, stud finder, level, framing square, T-nut installation tool (or a socket and hammer)
- Estimated Time: 8–16 hours for a basic vertical wall (one weekend); 20+ hours if you’re adding an angle or building freestanding
- Safety Precautions: Always confirm stud or joist locations before drilling anchor points; wear eye protection when drilling plywood; have a second person help lift and hold panels during install
- Common Errors: Skipping the stud finder and anchoring into drywall alone, using undersized plywood, spacing T-nuts unevenly, and underestimating how much the frame needs to flex-resist under dynamic loading
Step-by-Step Guide
1. Choose Your Location and Confirm Structure
Before anything else, find your studs. A basement or garage wall backed by solid framing is ideal. If you’re building into an existing interior wall, use a stud finder and confirm spacing (usually 16″ or 24″ on center). If the wall isn’t backed by continuous framing, you’ll need to build a freestanding frame instead — don’t anchor a climbing wall into drywall alone.
2. Build the Support Frame
Frame your structure using 2x4s or 2x6s, spaced to match your plywood sheet layout (typically every 16″ or 24″ on center, matching or bridging existing studs). This frame is what actually carries the climber’s weight, so tie it securely into the ceiling joists or floor if it’s freestanding, and into the existing wall studs if it’s attached.
3. Cut and Prep the Plywood
Cut your plywood sheets to size. If you’re covering an 8×8 area, that’s typically four 4×8 sheets. Lay them out and mark your T-nut grid before installing — most home walls use an 8-inch spacing pattern, which gives you enough flexibility to route different climbing problems later.
4. Drill and Install T-Nuts
Drill holes at your marked grid points, then hammer or press in the T-nuts from the back side so the prongs bite into the wood and the threaded barrel sits flush on the climbing surface. This is tedious but important — a loose T-nut will spin out under load and ruin a hold placement.
5. Mount the Plywood to the Frame
With a helper, lift and screw the plywood panels to your frame using structural wood screws (not drywall screws, which shear under lateral stress). Countersink screws slightly so they don’t interfere with hold placement.
6. Bolt On the Climbing Holds
Once the panel is secure, start bolting on holds. Mix hold sizes and types — jugs (big, easy grips) low and near the start, smaller crimps and slopers higher up if you want to add difficulty.
7. Test the Wall Before Use
Before anyone climbs, put your own body weight on the lowest holds and gently pull-test several T-nuts and frame connections. Check for any flex, popping sounds, or movement in the frame anchors.
Common Mistakes
- Anchoring into drywall instead of studs or a proper frame — this is the number one failure point I see
- Using thin plywood (1/2″ or less) that flexes and eventually cracks around the T-nuts
- Uneven T-nut spacing, which limits how you can route climbing problems later
- Skipping a load calculation for freestanding or angled walls — dynamic climbing loads (someone falling or lunging for a hold) are higher than static body weight
- Forgetting fall zone padding underneath the wall, especially for kids
Safety Considerations
This is where I get a little more serious than usual. A bookshelf falling over is annoying. A climbing wall failing is a real injury risk. A few non-negotiables:
- Keep the wall height reasonable for home use — most residential builds top out around 10–12 feet, and anything taller should really have a crash pad or bouldering mat system underneath
- Never mix hardware sizes randomly; match bolt threads to T-nut specs exactly
- If you’re building an overhang or anything beyond a simple vertical wall, get a structural opinion from a contractor or engineer before you load it
- Supervise kids on the wall, and set a house rule about one climber at a time
For broader guidance on structural safety and load-bearing considerations in home projects, the Consumer Product Safety Commission publishes useful general safety standards worth reviewing before finalizing any home structure that supports body weight.
Maintenance Tips
- Check T-nuts and hold bolts for looseness every few months — they will work loose with repeated use
- Wipe down holds periodically; chalk buildup makes surfaces slicker over time, not grippier
- Inspect the frame connections annually, especially in garages where humidity and temperature swings can affect wood
- Rotate hold placement occasionally to keep routes interesting and to even out wear on the T-nuts
Professional vs. DIY Comparison
| Factor | DIY Build | Professional Install |
|---|---|---|
| Cost | $300–$1,500 typical | $2,500–$8,000+ |
| Time | One to two weekends | Usually 1–3 days, faster |
| Structural confidence | Depends on builder skill | Engineered and code-checked |
| Customization | High — build exactly what you want | High, but at a premium |
| Best for | Vertical or lightly angled walls | Overhangs, large walls, commercial-grade builds |
If you’re comfortable with basic framing and you’re building a straightforward vertical wall, DIY is absolutely the right call. If you want an overhang, a freestanding structure taller than about 10 feet, or you’re not confident reading your home’s framing, it’s worth paying a contractor for at least a structural consult — the cost of a second opinion is a lot less than the cost of an accident.
Expert Recommendations
After building and consulting on a fair number of these, my honest advice: start smaller than you think you want to. A well-built 8×8 vertical wall with quality holds gets more actual use than an ambitious overhang that takes three months to finish and never quite gets bolted in right. You can always expand later — climbing walls are modular by nature, and adding a second panel next to your first one is a much easier project once you’ve done the first.
If you’re already planning framing work elsewhere in your home, it’s worth reading our guide on identifying and working with load-bearing walls before you finalize your climbing wall’s anchor points — the same principles apply when deciding what a wall can safely support.
Conclusion
Building a home climbing wall is one of those DIY projects that rewards careful planning more than raw carpentry skill. Get your framing right, anchor into real structure, use proper hardware, and space your T-nuts thoughtfully, and you’ll end up with something that gets used for years — not just a few weekends. Start with a straightforward vertical wall, test it thoroughly before anyone climbs, and expand once you’ve got the fundamentals dialed in. If anything about your home’s framing or load capacity feels uncertain, it’s worth the cost of a quick consult with a contractor before you start drilling.
FAQs
Do I need a permit to build a home climbing wall? In most areas, an interior climbing wall attached to existing framing doesn’t require a permit since it’s considered a fixture rather than structural construction. However, requirements vary by city and county, so it’s worth a quick call to your local building department, especially for freestanding or large-scale builds.
What’s the best plywood for a climbing wall? Baltic birch plywood is the industry standard because it holds T-nuts securely and has a smooth, splinter-resistant surface. Standard CDX plywood works for budget builds but wears faster around hardware.
How much weight can a home climbing wall hold? A properly framed wall anchored into studs with 3/4″ plywood and correctly installed T-nuts can typically handle well over 300 pounds of static and dynamic load per hold point, but this depends heavily on your framing and anchoring quality.
Can I build a climbing wall without attaching it to a wall stud? Yes, by building a freestanding frame that’s properly braced and anchored to the floor and ceiling joists, but this adds complexity and cost compared to anchoring into existing studs.
How much does it cost to build a climbing wall at home? Costs typically range from $300 for a basic budget build to $4,000 or more for a premium, professionally-assisted installation, depending on size, materials, and hold quality.
Do I need special holds, or can I use any climbing holds? Any standard commercial climbing holds will work as long as the bolt size matches your T-nuts. Buying a mixed set with various shapes and sizes gives you the most flexibility for setting routes.
Is a climbing wall safe for kids? Yes, with proper supervision, appropriately sized holds placed lower on the wall, and fall protection like a mat or padded flooring underneath.
How often should I inspect my climbing wall? Check hardware and T-nuts every few months with regular use, and do a full inspection of the frame and anchor points at least once a year.