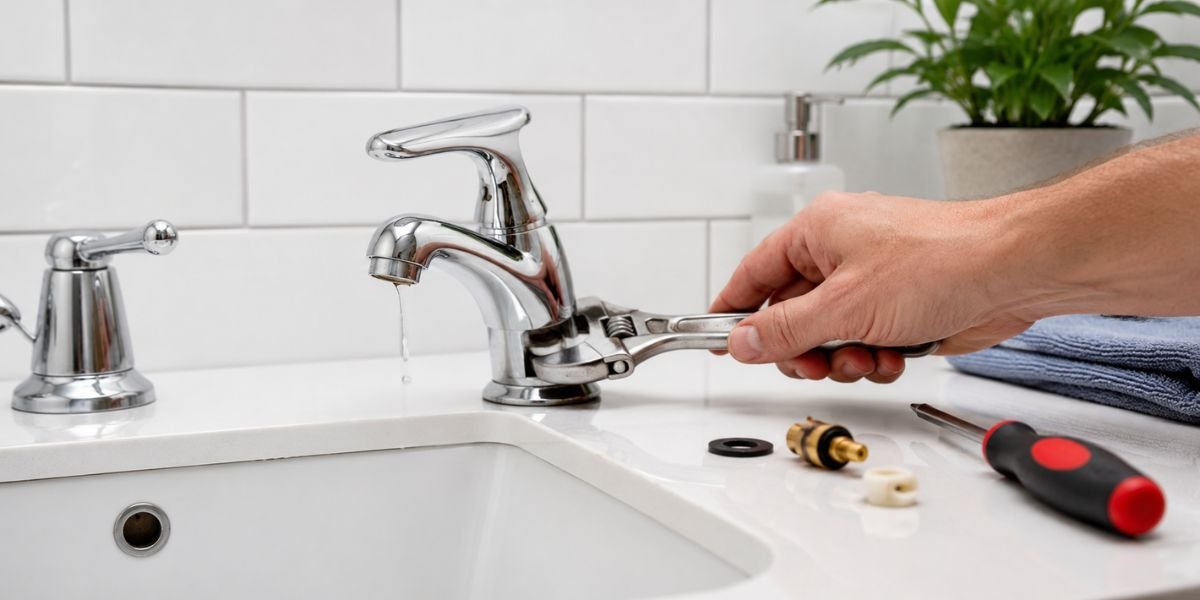
I still remember a service call from a few years back — a homeowner in a 1990s colonial who’d been putting up with a dripping kitchen faucet for over a year. She figured it was just “old house noise.” By the time I got there, that drip had eaten through the finish on her sink, left a mineral stain the shape of Florida, and quietly added almost $70 to her water bill every quarter. That’s the thing about a leaky faucet — it never fixes itself, and it always costs more the longer you wait.
Learning how to fix a leaky faucet is one of those skills that pays for itself almost instantly. In most cases, you’re looking at a worn washer, O-ring, or cartridge — parts that cost a few dollars and take less than an hour to replace once you know what you’re doing. This guide walks through exactly how I’d approach it on a real job, from diagnosis to the final leak test.
Quick Answer
Most leaky faucets are caused by a worn-out washer, O-ring, or cartridge inside the faucet body. To fix it: shut off the water supply, take the faucet apart (handle, then stem or cartridge), identify the worn part, replace it with an exact match, and reassemble. Total cost for parts usually runs $5–$25, and the job takes 30–60 minutes for most homeowners with basic tools.
What Causes a Leaky Faucet
Before you grab a wrench, it helps to understand what’s actually failing. Faucets leak for a handful of predictable reasons, and the fix depends entirely on which type of faucet you have.
Compression faucets (usually older, two-handle designs) use a rubber washer that gets compressed against a valve seat every time you shut the water off. Over years of use, that washer hardens, cracks, or wears down — and that’s your drip.
Cartridge faucets use a cylindrical cartridge instead of a washer. When the O-rings or seals inside wear out, you’ll usually see leaking around the base of the handle rather than the spout.
Ball-type faucets (common in single-handle kitchen faucets) rely on a rotating ball mechanism with several small springs, seats, and O-rings — more parts means more potential failure points.
Ceramic disc faucets are the most durable and least prone to leaking, but when they do fail, it’s usually the neoprene seals at the base.
Mineral buildup from hard water, corrosion, and simple wear-and-tear from thousands of on/off cycles are the underlying culprits behind nearly all of these. If you’re on well water or live in an area with hard water, expect faster wear on internal parts.
Benefits of Fixing It Yourself
- Cost savings — a plumber’s minimum service call often runs $100–$200 before parts, while a DIY repair kit costs a fraction of that.
- Water savings — a faucet dripping once per second wastes roughly 3,000 gallons a year, according to the EPA’s WaterSense program.
- Prevents bigger damage — ongoing leaks can damage cabinet bases, countertops, and even contribute to mold growth under the sink.
- Builds practical skills — once you’ve done one faucet, you can handle almost any brand with the same basic logic.
Drawbacks and When to Call a Pro
DIY isn’t always the right call. If your faucet is decades old and parts are no longer manufactured, if you’re dealing with corroded supply lines that won’t budge, or if the leak is actually coming from inside the wall (not the faucet itself), it’s time to bring in a licensed plumber. Forcing a stuck fitting is one of the most common ways a simple faucet repair turns into a full valve or pipe replacement.
Tools and Materials Needed
Tools Required:
- Adjustable wrench or basin wrench
- Set of Allen (hex) keys
- Flathead and Phillips screwdrivers
- Slip-joint pliers
- Plumber’s grease (silicone-based)
- Old towel or bucket (to catch residual water)
- Flashlight
Materials:
- Replacement washer, O-ring, or cartridge (matched to your faucet model)
- Plumber’s tape (Teflon tape)
Skill Level: Beginner to Intermediate Estimated Time: 30–60 minutes Safety Precautions: Always shut off the water supply before starting, wear eye protection when working under the sink, and keep a towel handy for any residual water in the lines.
Step-by-Step Guide to Fixing a Leaky Faucet
1. Shut Off the Water Supply
Locate the shutoff valves under the sink and turn them clockwise until fully closed. If there are no dedicated valves (common in older homes), you’ll need to shut off the main water supply to the house.
2. Release Remaining Pressure
Turn the faucet handle on to release any water still in the lines, and plug the drain so small parts don’t disappear down it — a mistake I’ve seen even experienced DIYers make.
3. Remove the Handle
Most handles are held on by a screw hidden under a decorative cap. Pop the cap off with a flathead screwdriver, remove the screw, and gently lift or wiggle the handle free.
4. Access the Cartridge, Stem, or Ball
Depending on your faucet type, you’ll now see either a retaining nut (compression and ball faucets) or a cartridge held by a clip. Use your wrench or pliers to remove it, noting the order of parts as you go — I always lay them out in a line on a towel so reassembly is foolproof.
5. Inspect and Identify the Worn Part
Look for a hardened, cracked, or flattened washer, a brittle O-ring, or visible corrosion. This is your culprit.
6. Replace the Part
Take the old part to a hardware store to match it exactly, or use a manufacturer-specific repair kit if you know your faucet brand and model. Apply a thin layer of plumber’s grease to new O-rings before installing — it helps them seat properly and extends their life.
7. Reassemble in Reverse Order
Put the stem or cartridge back, reattach the retaining nut, reinstall the handle, and snap the decorative cap back into place.
8. Turn the Water Back On and Test
Slowly open the shutoff valves, then run the faucet on both hot and cold settings. Check under the sink for any drips at the connections while it’s running.
Cost Breakdown
Costs for fixing a leaky faucet can vary based on your location, faucet brand, and whether you tackle it yourself or hire a plumber.
DIY Repair:
- Budget option: $5–$10 (generic washer/O-ring kit)
- Mid-range option: $15–$25 (brand-specific cartridge)
- Premium option: $30–$50 (ceramic disc cartridge for high-end fixtures like Moen, Delta, or Kohler)
Professional Plumber:
- Service call/minimum fee: typically $75–$150
- Parts and labor combined: often $150–$300 depending on the faucet and region
Keep in mind labor rates, permit requirements (rare for a simple faucet swap, but relevant if you’re replacing supply lines or shutoff valves), and material costs all vary by region — always get a local quote before assuming a number applies to you.
Common Mistakes to Avoid
- Skipping the water shutoff — even a “quick fix” can turn into a flooded cabinet.
- Mismatched replacement parts — a washer that’s slightly the wrong size will leak again within weeks.
- Overtightening fittings — this cracks plastic components and strips threads, especially on newer faucets with more plastic internals.
- Losing small parts — springs and seats are tiny and easy to lose down the drain or in clutter.
- Ignoring the valve seat — if it’s corroded or pitted, a new washer alone won’t stop the leak; you may need a valve seat wrench to resurface it.
Maintenance Tips to Prevent Future Leaks
- Clean aerators every few months to prevent mineral buildup that stresses internal seals.
- Avoid slamming handles shut — a gentle close reduces wear on washers and cartridges.
- If you have hard water, consider a water softener; it significantly extends the life of faucet internals.
- Do a quick under-sink inspection twice a year to catch slow leaks before they cause cabinet damage.
Professional vs. DIY Comparison
| Factor | DIY Repair | Professional Plumber |
|---|---|---|
| Cost | $5–$50 | $150–$300+ |
| Time | 30–60 minutes | Same day, scheduled |
| Skill needed | Basic tools, some patience | Licensed expertise |
| Best for | Standard washer/cartridge swaps | Corroded pipes, valve replacement, warranty work |
Safety Considerations
Always shut off water at the source before disassembling anything — working on a pressurized line is how minor jobs become plumbing emergencies. If your home has older galvanized or corroded shutoff valves, be gentle; they can crack or snap unexpectedly. When in doubt about whether a fitting is under pressure, treat it as if it is.
Expert Recommendations
In my experience, it’s almost always worth buying a full repair kit for your specific faucet brand rather than a single generic washer. The extra couple of dollars buys you matched O-rings and springs, which means you’re not back under the sink again in six months. And if your faucet is more than 15–20 years old, factor in that a full faucet replacement (often $150–$400 including labor) may be more cost-effective long-term than repeatedly patching an aging fixture.
For more on planning bigger kitchen or bathroom upgrades alongside smaller repairs like this one, our complete plumbing renovation guide breaks down what to prioritize and budget for.
Conclusion
A leaky faucet is one of the most common — and most fixable — problems in any home. In nearly every case, the fix comes down to identifying whether you have a washer, cartridge, or ball-type faucet, then replacing the specific worn part with an exact match. Shut off the water, work methodically, keep track of your parts, and test thoroughly before calling the job done. If the leak persists after a repair, or if you’re dealing with corrosion and stuck fittings, that’s your signal to bring in a licensed plumber rather than risk water damage.
Next step: Turn off your water supply, take a look under your sink, and identify your faucet type before you buy any parts. That fifteen minutes of diagnosis will save you a second trip to the hardware store.
Frequently Asked Questions
1. Why does my faucet still leak after I replaced the washer? This usually means the valve seat is corroded or pitted, or you installed a slightly mismatched washer size. A valve seat wrench can resurface the seat, or you may need professional help.
2. How much water does a dripping faucet actually waste? According to the EPA’s WaterSense program, a faucet dripping at one drop per second can waste around 3,000 gallons of water per year — enough for over 180 showers.
3. Can I fix a leaky faucet without turning off the main water valve? Yes, if your faucet has dedicated shutoff valves under the sink, you only need to close those. Only shut off the main line if those valves are missing or non-functional.
4. Is it normal for a new faucet to drip slightly at first? A very slight drip immediately after installation can be normal as parts settle, but persistent dripping after a day or two usually points to an improperly seated cartridge or O-ring.
5. How do I know if I have a compression, cartridge, ball, or ceramic disc faucet? Compression faucets typically have separate hot and cold handles that you turn until they stop. Single-handle faucets are usually cartridge, ball, or ceramic disc — you’ll need to open it up to confirm which.
6. Can a leaky faucet raise my water bill significantly? Yes. Even a minor drip adds up over months, and a running leak can add measurable cost to your quarterly water bill, though exact amounts depend on local water rates.
7. What’s the average lifespan of faucet internals like washers and cartridges? Washers typically last 3–7 years depending on water quality and usage; cartridges can last longer, often 10+ years, though hard water shortens this considerably.
8. Should I replace the whole faucet instead of repairing it? If the faucet is old, parts are discontinued, or you’re already replacing it for other reasons (style, function), a full replacement often makes more sense than repeated repairs.