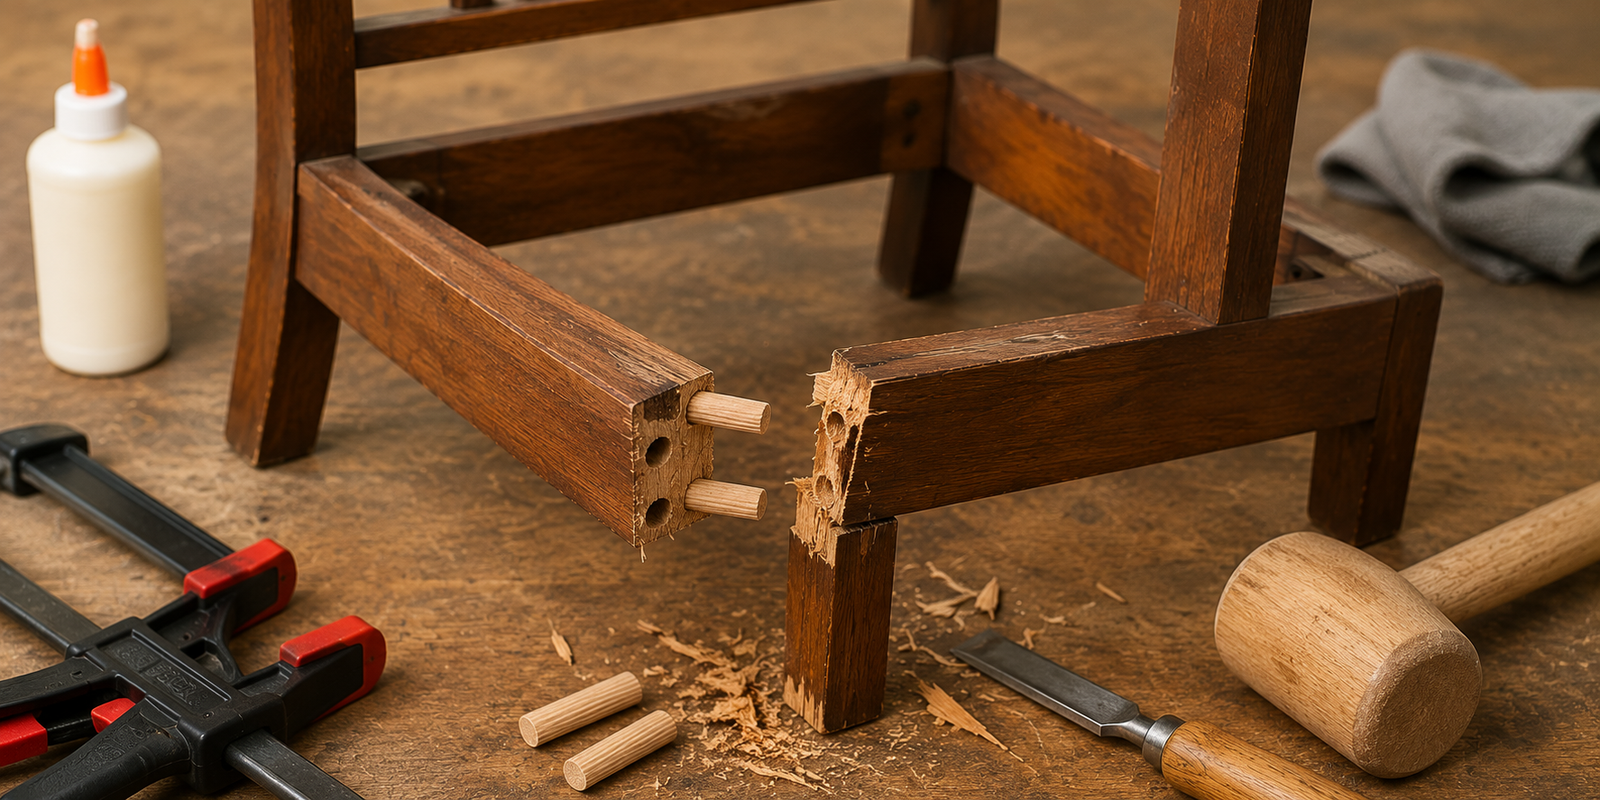
A broken chair joint can turn a sturdy piece of furniture into a wobbly and uncomfortable one. You may notice a gap between two wooden parts, hear cracking or squeaking, or feel the chair move when you sit down.
The good news is that some broken chair joints can be repaired at home if the surrounding wood is still solid. The important part is to identify why the joint failed, clean and prepare the damaged connection properly, and rebuild it without creating additional stress.
If your chair is moving but you aren’t sure whether the problem is a broken joint or another part of the frame, start with How to Fix a Wobbly Chair. A wobbly chair can sometimes be the first warning that one of its structural connections is failing.
Quick Answer: To repair a broken chair joint, inspect the damaged connection, separate loose components when possible, remove failed adhesive, repair or replace damaged joint components, apply suitable adhesive, realign the frame, and clamp it until fully cured. Severely split or rotten wood may require replacement rather than a simple glue repair.
What Is a Chair Joint?
A chair joint is the connection where two or more parts of the chair frame meet.
Common examples include:
- Leg-to-seat joints
- Rail-to-leg joints
- Backrest joints
- Dowel joints
- Mortise-and-tenon joints
- Corner connections
- Spindle connections
These joints transfer the load through the chair frame. That’s why a damaged joint shouldn’t be treated as a purely cosmetic problem.
Why Do Chair Joints Break?
Chair joints can fail for several reasons.
Common causes include:
- Old or failed adhesive
- Repeated movement
- Excessive weight
- Leaning or rocking
- Poor previous repairs
- Loose-fitting joints
- Damaged dowels
- Cracked wood
- Moisture-related movement
- Dragging the chair
- Normal long-term wear
A small amount of movement can gradually increase until the joint begins to separate.
Canadian Woodworking notes that chairs experience repeated forces from sitting, shifting, and moving, and that loose joints can progress into more difficult repairs if ignored.
Signs of a Broken Chair Joint
Look for these warning signs:
- A visible gap at the joint
- One part of the frame moving independently
- Cracked wood
- Squeaking when the chair is used
- A leg that feels loose
- Backrest movement
- Repeatedly loose screws
- The chair becoming wobbly
If the chair has major structural movement, don’t continue using it until the problem has been repaired.
Tools and Materials You’ll Need
Depending on the type of joint, you may need:
- Wood glue
- Clamps
- Rubber mallet
- Screwdriver
- Drill
- Drill bits
- Wooden dowels
- Sandpaper
- Wood chisel
- Clean cloth
- Wood shims
- Replacement hardware
- Measuring tape
- Safety glasses
You won’t need every tool for every repair.
7 Ways to Repair a Broken Chair Joint
1. Separate the Broken Joint Carefully
The first step is to inspect the joint properly.
If the connection is already loose, gently separate the components rather than forcing them apart.
Don’t hammer aggressively on a chair frame.
A rubber mallet can be useful for carefully separating or repositioning suitable wooden components without unnecessarily damaging the finished surface.
Before removing anything, take a few photos of the chair.
This helps you remember the original orientation of the parts during reassembly.
2. Remove Old Glue and Debris
Old adhesive can prevent a repaired joint from fitting properly.
Once the joint is accessible, remove loose glue from the mating surfaces.
Pay particular attention to:
- Mortises
- Tenons
- Dowel holes
- Joint faces
- Small gaps around the connection
Avoid removing good structural wood unnecessarily.
The goal is to expose clean, sound surfaces—not enlarge the joint.
Canadian Woodworking’s chair-repair guidance similarly recommends cleaning old adhesive from mortises and tenons before rebuilding a loose joint.
3. Repair or Replace a Damaged Dowel
Some chair joints rely on wooden dowels to hold the components together.
A broken or loose dowel can prevent the joint from closing properly.
Inspect the dowel carefully.
If it is:
- Cracked
- Broken
- Too short
- Severely worn
- Loose inside the hole
it may need replacement.
Use a replacement dowel that fits the joint correctly.
Don’t force an oversized dowel into a damaged hole.
4. Repair a Cracked Joint Area
Sometimes the joint itself isn’t the only problem.
The wood around the connection may also be cracked.
A small, repairable crack may be treated with appropriate adhesive and clamping, provided the surrounding material remains structurally sound.
However, a major crack through a load-bearing component can be a different situationIf you discover extensive cracking, see How to Repair a Cracked Wooden Chair before continuing.
Don’t assume that filling a crack with cosmetic filler will restore structural strength.
5. Rebuild the Joint With Suitable Adhesive
Once the joint surfaces are clean and fit correctly, apply an adhesive suitable for the materials and joint design.
Then:
- Apply the adhesive as directed.
- Reassemble the components.
- Check alignment.
- Remove excessive squeeze-out.
- Clamp the joint.
- Allow it to cure completely.
Different adhesives have different properties, so follow the manufacturer’s instructions rather than assuming every wood adhesive works identically.
For complex furniture repairs, adhesive selection can matter significantly. Canadian Woodworking’s intermediate chair-repair guidance specifically notes that different glue types have different advantages and disadvantages.
6. Reinforce a Weak Repaired Joint
Some joints may need additional reinforcement after the original connection has been restored.
Depending on the design, reinforcement could include:
- Wooden corner blocks
- Dowels
- Appropriate screws
- Structural wooden supports
- Replacement joint components
The reinforcement should connect to sound wood.
Don’t install a screw or bracket into severely split or rotten material and expect it to provide reliable support.
If several parts of the chair are weak rather than just one joint, read How to Reinforce a Weak Chair for broader strengthening methods.
7. Replace the Joint or Damaged Component
Not every broken joint can be repaired with glue.
Replacement may be necessary when:
- The wood is badly split.
- The joint has lost too much material.
- The surrounding wood is rotten.
- A major structural component is broken.
- The original joint has repeatedly failed.
- Important material is missing.
In these situations, rebuilding the damaged section or replacing the component may provide a more reliable result.
How to Repair a Broken Chair Leg Joint
A leg-to-frame joint carries significant load.
Start by determining whether:
- The leg itself is broken.
- The joint has separated.
- The dowel has failed.
- The surrounding frame is cracked.
Don’t confuse a loose leg with a completely broken leg.
If the leg is intact but the connection has separated, joint repair may be enough. For a damaged or broken leg, see How to Repair a Broken Chair Leg.
How to Repair a Dining Chair Joint
Dining chairs are exposed to repeated daily loading, so their joints can gradually loosen.
Turn the chair over and inspect the underside.
Check:
- Leg joints
- Seat rails
- Corner blocks
- Backrest connections
- Screws
- Dowels
If the chair has several problems at once, our How to Repair a Dining Chair guide covers additional repair methods.
How to Fix a Chair Joint That Keeps Coming Loose
If a repaired joint becomes loose again, don’t simply add more glue.
Ask why it failed.
Possible causes include:
- The joint wasn’t cleaned properly.
- The parts don’t fit correctly.
- The surrounding wood is damaged.
- The chair is under excessive stress.
- The adhesive wasn’t given enough time to cure.
- The original joint design has deteriorated.
A repair that repeatedly fails may indicate that the joint needs rebuilding rather than another quick repair.
How to Clamp a Chair Joint
Clamping holds the repaired components in their correct position while the adhesive cures.
Position the clamp so that it applies pressure directly across the joint.
Use protective padding where necessary to avoid damaging finished wood.
Avoid Excessive Pressure
Over-clamping can distort the frame or squeeze too much adhesive from the joint.
The goal is to bring the joint surfaces together—not crush them.
How Long Should a Repaired Chair Joint Cure?
Always follow the adhesive manufacturer’s instructions.
Curing time depends on:
- Adhesive type
- Temperature
- Humidity
- Joint size
- Wood condition
- Amount of adhesive
Don’t assume the chair is ready simply because the surface of the adhesive feels dry.
Keep the repaired chair unloaded until the recommended curing period has passed.
How to Test a Repaired Chair Joint
After the adhesive has fully cured, inspect the repair.
Step 1: Check the Joint
Look for gaps.
Step 2: Check Alignment
Make sure the chair frame is straight.
Step 3: Check for Movement
Apply gentle pressure around the repaired area.
Step 4: Inspect Nearby Joints
A failed joint may have placed additional stress on surrounding connections.
Step 5: Test Gradually
Don’t immediately put full body weight onto a newly repaired chair.
If the joint still moves significantly, stop using the chair and reassess the repair.
Common Mistakes When Repairing Chair Joints
Adding Glue Without Cleaning the Joint
Old adhesive can interfere with proper contact.
Using Too Much Glue
More adhesive doesn’t automatically create a stronger joint.
Enlarging the Joint Accidentally
Removing too much wood can make the connection loose.
Using a Random Screw or Bracket
Hardware must be appropriate for the chair’s construction.
Ignoring Cracks
A cracked structural component may need more than adhesive.
Testing Too Soon
A partially cured joint may fail under load.
How to Prevent Chair Joints From Breaking Again
Once the repair is complete, proper use can help extend its life.
Avoid Rocking Back on Two Legs
This creates unnecessary stress on the frame.
Lift the Chair Instead of Dragging It
Dragging can loosen joints over time.
Repair Small Movement Early
Don’t wait until a small gap becomes a broken connection.
Check Screws and Joints Periodically
Regular inspection can catch developing problems.
Avoid Excessive Loads
Use the chair for its intended purpose.
When Should You Replace the Chair?
Sometimes replacement is safer than repair.
Consider professional restoration or replacement when:
- Multiple structural joints are broken.
- The frame has extensive rot.
- Major components are missing.
- The chair remains unstable after repair.
- The same joint repeatedly fails.
- The repair would require rebuilding most of the frame.
For valuable antique furniture, professional restoration can be preferable to an irreversible DIY modification.
Final Thoughts
A broken chair joint doesn’t always mean the chair is beyond repair.
The most important step is to diagnose the actual cause before applying glue or hardware. A loose connection, damaged dowel, cracked frame, and completely broken component each require a different approach.
Clean the joint carefully, preserve as much sound wood as possible, use an appropriate repair method, align the components correctly, and allow the repair to cure fully before testing the chair.
If the surrounding wood is severely damaged or the joint repeatedly fails, don’t rely on a quick fix. A stronger long-term repair may require replacing the damaged component.
FAQs
Can a broken chair joint be repaired?
Yes, many wooden chair joints can be repaired when the surrounding wood is still structurally sound.
What is the best glue for a broken chair joint?
The appropriate adhesive depends on the materials, joint design, and size of the gap. Follow the adhesive manufacturer’s recommendations rather than using one product for every repair.
Can I repair a broken chair joint without taking the chair apart?
Sometimes, but a proper repair is often easier when the damaged joint can be accessed and cleaned. Don’t force a joint apart if doing so could cause additional damage.
Should I use screws to reinforce a broken chair joint?
Screws can sometimes provide additional mechanical support, but they should only be used when appropriate for the chair’s construction and installed into sound wood.
How do I know if a chair joint is too damaged to repair?
Severe splitting, rotten wood, missing structural material, or repeated repair failure can indicate that replacement or professional restoration is more appropriate.
Can wood filler repair a broken chair joint?
Wood filler can improve the appearance of minor surface damage, but it shouldn’t be relied upon as the main repair for a load-bearing structural joint.
Why does my repaired chair joint keep coming loose?
The joint may still have old adhesive, poor fit, damaged wood, inadequate curing, or excessive stress. Repeated failure means you should investigate the underlying cause rather than simply adding more glue.
How long should I wait before using the chair?
Follow the adhesive manufacturer’s full curing instructions. Don’t put normal loads on the repaired joint before it has completely cured.