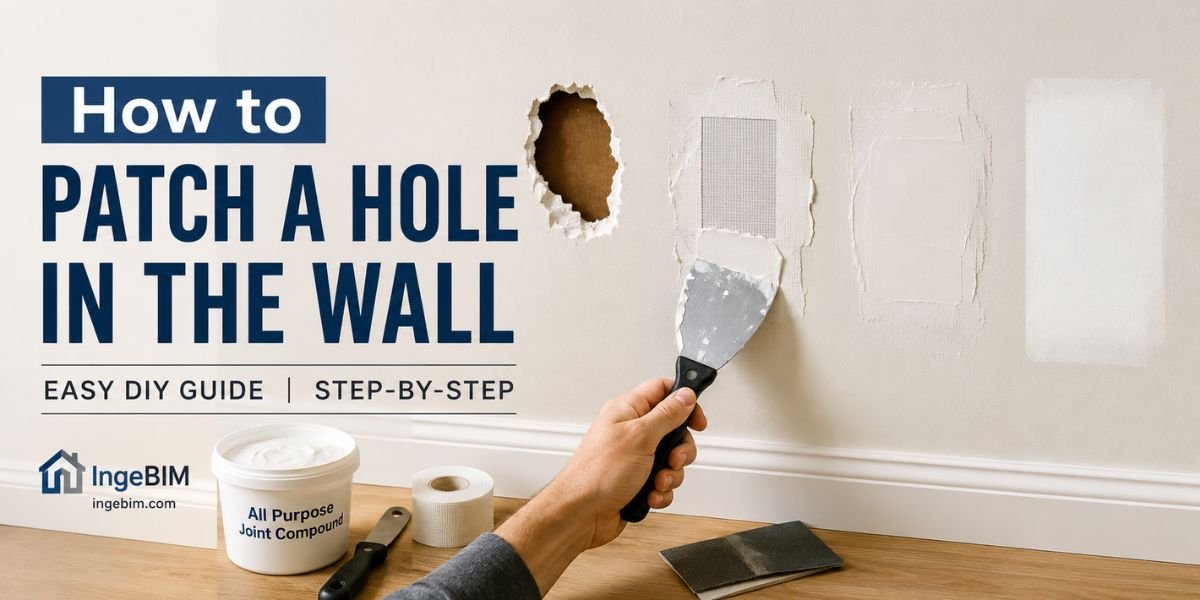
Have you ever moved a piece of furniture only to discover a hole in the wall? Maybe a doorknob punched through the drywall, a shelf left behind large screw holes, or an old TV mount created a damaged patch that now stands out every time you walk into the room.
The good news is that most wall damage is easier to repair than people think. Whether you’re dealing with a tiny nail hole or a larger opening caused by an accident, you don’t need to replace an entire wall. With the right materials and a little patience, you can make the damaged area almost disappear.
The biggest mistake homeowners make is treating every wall repair the same way. A small nail hole doesn’t need the same repair method as a fist-sized hole in drywall. Likewise, plaster walls and concrete walls require different materials than modern drywall.
In this guide, I’ll walk you through each repair method step by step, explain which tools actually matter, and share professional tips that make the finished repair look smooth instead of obvious.
By the end of this guide, you’ll know exactly how to patch a hole in the wall, prepare it for paint, and achieve results that look like the damage never happened.
Why Do Holes Appear in Walls?
Walls go through years of daily wear and tear. Even a well-maintained home eventually develops dents, cracks, or holes. Understanding what caused the damage helps you choose the best repair method.
Some of the most common causes include:
Hanging Pictures and Decorations
Nails, screws, and wall anchors leave behind small holes once removed. Fortunately, these are among the easiest repairs.
Door Handle Damage
Missing door stops often allow handles to strike drywall repeatedly until a hole forms.
Moving Furniture
Beds, dressers, couches, dining tables, and appliances frequently bump into walls during moving, leaving dents or broken drywall.
Shelves and TV Mounts
Heavy wall-mounted shelves or televisions can damage drywall if anchors loosen or are removed improperly.
Electrical or Plumbing Repairs
After electrical wiring or plumbing work, contractors often cut into drywall to reach pipes or cables, leaving larger openings that require patching.
Kids and Pets
Children playing indoors and energetic pets can accidentally damage walls with toys, furniture, or rough play.
Water Damage
Leaks can weaken drywall over time, causing soft spots that eventually crumble into holes.
Pro Tip: Before repairing any damaged wall, make sure the cause has been fixed. For example, repairing water-damaged drywall before fixing the leak usually means you’ll be doing the same repair again a few weeks later.
Identify Your Wall Type Before You Start
One reason many DIY wall repairs fail is that people assume every wall is drywall. Different wall materials require different repair techniques.
Spend two minutes identifying your wall before buying supplies.
Drywall
Drywall is the most common wall material in modern homes. It’s made from gypsum covered with paper and is lightweight and easy to repair.
You’ll usually notice:
- Hollow sound when tapped
- White gypsum inside broken edges
- Paper covering on both sides
Drywall repairs usually require:
- Lightweight spackle
- Joint compound
- Mesh repair patch
- Sandpaper
Plaster Walls
Older homes often have plaster walls instead of drywall.
Plaster feels much harder and thicker than drywall and usually produces a solid sound when tapped.
These walls require extra care because damaged edges can continue crumbling if handled aggressively.
For plaster walls, breathable fillers usually produce better long-term results.
Concrete Walls
Concrete walls don’t have hollow cavities like drywall.
Instead of covering a hole with a mesh patch, you’ll typically fill damaged areas using masonry filler or repair mortar.
Brick Walls
Brick walls require mortar-based repairs instead of drywall compound.
If bricks themselves are damaged, replacing the damaged section may be necessary.
Quick Wall Identification Guide
| Wall Type | Sound When Tapped | Best Repair Method |
|---|---|---|
| Drywall | Hollow | Spackle, mesh patch, joint compound |
| Plaster | Solid | Plaster repair filler |
| Concrete | Very hard | Masonry repair compound |
| Brick | Solid | Mortar repair |
Knowing your wall type before starting makes the repair easier and helps prevent cracks from returning later.
Tools and Materials You’ll Need
Having the right tools nearby makes the repair faster and produces a cleaner finish.
Fortunately, most items are inexpensive and available at any home improvement store.
Essential Tools
- Putty knife
- Utility knife
- Sanding block
- 120- to 220-grit sandpaper
- Dust brush or microfiber cloth
- Paint roller
- Small paintbrush
- Mixing tray
- Drop cloth
- Safety glasses
- Dust mask
Essential Materials
- Lightweight spackle
- Joint compound
- Self-adhesive drywall mesh patch
- Primer
- Matching wall paint
- Drywall repair kit (optional)
- Painter’s tape
Optional Supplies for Large Repairs
If you’re repairing a larger hole, you may also need:
- Drywall saw
- Replacement drywall piece
- Wood backing strips
- Drywall screws
- Drill
- Measuring tape
Safety Equipment
Wall repairs create a surprising amount of dust.
Protect yourself by wearing:
- Safety glasses
- Dust mask
- Gloves when sanding or cutting drywall
Taking five minutes to prepare your workspace can save much more time during cleanup.
How to Patch Small Nail and Screw Holes
Small holes are by far the easiest type of wall damage to repair.
If the hole is left behind by a nail, picture hook, or screw, you usually won’t need a repair patch—just quality wall filler.
Step 1: Remove Loose Material
Inspect the hole carefully.
Use the corner of your putty knife or a utility knife to remove any loose paint, drywall paper, or crumbling material around the edges.
Clean edges allow filler to bond much better.
Step 2: Clean the Surface
Dust is one of the biggest reasons filler fails.
Wipe the area using a damp cloth or soft brush to remove loose particles.
Allow the wall to dry completely before moving on.
Step 3: Apply Lightweight Spackle
Using a putty knife, press the filler firmly into the hole.
Rather than simply covering the surface, push the filler deep into the opening.
This creates a much stronger repair.
Step 4: Remove Excess Filler
Hold the putty knife at a slight angle and scrape away excess material.
The goal isn’t to leave a thick mound.
Instead, create a smooth, nearly flat surface with only a slight amount of filler remaining.
Professional painters usually remove more filler than beginners do.
Step 5: Let It Dry Completely
Drying time depends on:
- Temperature
- Humidity
- Hole depth
- Product instructions
Most lightweight fillers dry within 30 minutes to 2 hours.
Avoid sanding before the filler is completely dry.
Step 6: Sand Smooth
Use fine-grit sandpaper (around 220 grit) to blend the repaired area into the surrounding wall.
Run your hand across the repair.
If you can feel a ridge, continue sanding gently until the surface feels smooth.
Step 7: Prime Before Painting
Many DIYers skip primer.
That’s a mistake.
Fresh filler absorbs paint differently than the surrounding wall, often leaving a dull patch.
Apply one thin coat of primer first.
Step 8: Paint the Repair
Once the primer has dried, apply matching wall paint using either:
- A small brush for tiny repairs
- A mini roller for better texture blending
After the paint dries, the repaired area should blend naturally with the surrounding wall.
Expert Tips for Small Wall Repairs
- Apply two thin coats of filler instead of one thick layer.
- Never sand filler before it’s fully dry.
- Feather the edges beyond the repair for a seamless finish.
- Use matching paint sheen (matte, eggshell, satin, or gloss) to avoid visible patches.
- Always remove dust before priming and painting.
6. How to Repair Medium-Sized Holes in Drywall
Not every wall hole can be fixed with a little spackle. If the hole is about 2 to 6 inches wide, you’ll need a stronger repair. This is where a self-adhesive mesh patch becomes your best friend.
Unlike small nail holes, medium holes need extra support so the filler doesn’t crack or sink after it dries.
Step 1: Clean Around the Hole
Before applying anything, inspect the damaged area.
Remove:
- Loose drywall paper
- Cracked paint
- Dust
- Broken drywall pieces
Use a utility knife to trim rough edges. A clean opening helps the repair patch stick securely.
Pro Tip: Don’t leave torn drywall paper around the hole. It often bubbles under joint compound and creates an uneven finish.
Step 2: Choose the Right Patch Size
Repair patches come in several sizes.
Choose one that extends at least 1 inch beyond the damaged area on every side.
For example:
| Hole Size | Recommended Patch |
|---|---|
| 2 inches | 4-inch mesh patch |
| 3 inches | 6-inch mesh patch |
| 5 inches | 8-inch repair patch |
A slightly larger patch provides much better strength.
Step 3: Apply the Mesh Patch
Peel the protective backing from the repair patch.
Carefully center it over the hole.
Press firmly around all edges to ensure it bonds well with the wall.
If the patch lifts at the corners, remove it and clean the surface again before reapplying.
Step 4: Apply the First Coat of Joint Compound
Using a 6-inch putty knife, spread a thin layer of joint compound over the mesh.
Work from the center outward.
Cover the entire patch while pressing compound through the mesh for a stronger bond.
Avoid applying too much.
Thin coats always produce smoother repairs.
Step 5: Feather the Edges
This is where professionals separate themselves from beginners.
Instead of stopping at the patch edge, spread the compound several inches beyond the repair.
Feathering creates a gradual transition that becomes almost invisible after painting.
Step 6: Let It Dry Completely
Drying usually takes:
- 2–4 hours for lightweight compounds
- Up to 24 hours for traditional joint compound
Never rush this step.
Step 7: Apply a Second Coat
After drying, inspect the repair.
Most patches need a second wider coat to completely hide the mesh.
Spread the second coat wider than the first.
This creates an even smoother transition.
Step 8: Sand Smooth
Once dry, sand lightly with 220-grit sandpaper.
Use gentle circular motions.
The repair should blend smoothly into the surrounding wall without noticeable ridges.
Step 9: Prime and Paint
After removing dust:
- Apply primer.
- Allow it to dry.
- Paint with matching wall paint.
A mini roller usually blends texture better than a paintbrush.
7. How to Fix a Large Hole in the Wall Like a Professional
Large holes require a completely different repair technique.
If the opening is larger than 6 inches, simply covering it with filler usually fails.
Instead, you’ll replace the damaged section with a new piece of drywall.
Although this sounds difficult, it’s actually straightforward if you follow the steps carefully.
Step 1: Square the Damaged Area
Large holes often have jagged edges.
Use a drywall saw or utility knife to cut the damaged area into a clean square or rectangle.
Straight cuts make fitting the replacement much easier.
Step 2: Add Wooden Backing Support
Cut two wooden strips slightly longer than the hole.
Slide them inside the wall.
Secure them using drywall screws through the existing wall.
These boards provide a strong backing for the new drywall.
This step is what makes professional repairs so durable.
Step 3: Cut a Replacement Drywall Piece
Measure the opening carefully.
Transfer those measurements onto a drywall panel.
Cut the replacement piece slightly smaller if necessary so it fits snugly without forcing it.
Step 4: Screw the Patch Into Place
Position the drywall piece over the wooden supports.
Secure it with drywall screws.
The surface should sit flush with the existing wall.
Step 5: Apply Drywall Tape
Cover every joint using drywall mesh tape or paper tape.
This prevents future cracks from forming along the seams.
Step 6: Spread Joint Compound
Apply the first thin coat over the tape.
Don’t try to make everything perfect yet.
The first coat mainly locks the tape into place.
Allow it to dry completely.
Step 7: Build Up Additional Coats
Professional drywall repairs usually require two or three coats.
Each coat should be wider than the previous one.
This gradually blends the repair into the surrounding wall.
Patience here makes all the difference.
Step 8: Sand Until Invisible
Sand each dried coat lightly.
Shine a flashlight across the wall.
Any bumps or ridges will become easy to spot.
Continue sanding until the repair feels perfectly smooth.
Step 9: Prime and Paint
Apply one coat of primer.
Finish with matching paint.
If your wall has a textured finish, use a mini roller or texture spray before painting.
8. How to Repair Holes in Plaster Walls
Older homes often have plaster walls instead of drywall.
While they look similar after painting, they repair differently.
Plaster is harder but also more brittle.
That means aggressive sanding or cutting can create even more damage.
Remove Loose Material Carefully
Use a putty knife to remove only loose plaster.
Don’t force large chunks away from the wall.
Stop once you reach solid material.
Fill Deep Areas in Layers
Instead of one thick application, build the repair gradually.
Thin layers reduce shrinkage and cracking.
Allow each coat to dry before adding another.
Sand Gently
Unlike drywall compound, plaster fillers can become extremely hard.
Sand lightly to avoid damaging surrounding areas.
Match the Existing Texture
Many plaster walls have slight texture.
Use a damp sponge or textured roller to blend the repaired area before painting.
Prime Before Painting
Because plaster absorbs moisture differently, primer helps ensure an even paint finish.
9. Sanding, Priming, and Painting for an Invisible Repair
Many people believe filling the hole is the hardest part.
Actually, finishing determines whether anyone notices the repair.
Sand Slowly
Always sand using light pressure.
Over-sanding creates low spots that become visible after painting.
Feel the Surface
Close your eyes.
Run your hand across the repair.
Your fingers often detect imperfections your eyes miss.
Remove Every Bit of Dust
Dust prevents primer from bonding correctly.
Use:
- Damp microfiber cloth
- Vacuum with brush attachment
- Soft paintbrush
Allow the wall to dry before priming.
Apply Primer
Primer seals the repaired area.
Without primer, fresh filler usually absorbs paint differently and creates visible flashing.
One thin coat is usually enough.
Paint for a Seamless Finish
For best results:
- Use the exact same paint color.
- Match the paint finish (flat, eggshell, satin, or semi-gloss).
- Apply two thin coats rather than one heavy coat.
If the wall was painted several years ago, repainting the entire wall often gives the most consistent appearance.
10. Common Mistakes That Make Wall Repairs Look Bad
Even simple repairs can look obvious if a few key steps are skipped.
Here are the mistakes professionals avoid.
Applying Too Much Filler
Thick layers take longer to dry, shrink more, and require extra sanding.
Use several thin coats instead.
Skipping Primer
Paint absorbs unevenly without primer.
This leaves dull patches that remain visible even after multiple coats.
Sanding Too Soon
If the filler hasn’t fully cured, sanding can tear the surface and weaken the repair.
Always follow the drying time recommended by the product.
Forgetting to Clean the Wall
Dust and debris reduce adhesion.
Always wipe the area before priming and painting.
Using the Wrong Repair Method
Small holes need filler.
Medium holes need a mesh patch.
Large holes need a drywall replacement.
Using filler alone on a large hole almost always leads to cracking.
Ignoring Moisture Problems
If the wall was damaged by a leak, fix the source of the moisture before making repairs.
Otherwise, the problem will return.
Rushing the Job
Professional-looking repairs come from patience.
Allow every coat to dry completely before moving to the next step.
DIY Pro Tips
- Keep two putty knives—a narrow one for filling and a wider one for feathering.
- Shine a flashlight across the wall before painting to reveal hidden ridges.
- Mix only the amount of compound you need to reduce waste.
- Protect floors with a drop cloth before sanding.
- Save a small container of matching paint for future touch-ups.
11. How Much Does It Cost to Patch a Hole in a Wall?
One of the biggest questions homeowners ask is whether it’s cheaper to repair a wall themselves or hire a professional. The answer depends on the size of the hole, the materials needed, and whether you already own basic DIY tools.
The good news is that most small and medium wall repairs are inexpensive and can usually be completed in an afternoon.
Average DIY Repair Costs
| Repair Type | Estimated DIY Cost |
|---|---|
| Nail or Screw Hole | $5–$15 |
| Small Drywall Hole | $10–$25 |
| Medium Hole with Mesh Patch | $20–$40 |
| Large Drywall Repair | $40–$80 |
| Primer and Paint Touch-Up | $15–$40 |
If you don’t already have tools like a putty knife or sanding block, your first repair may cost a little more. However, these tools can be reused for future home projects.
Professional Repair Costs
Hiring a handyman is a good option if you’re short on time or dealing with extensive damage.
| Repair Size | Average Professional Cost |
|---|---|
| Small Hole | $50–$100 |
| Medium Hole | $100–$250 |
| Large Drywall Hole | $200–$500+ |
| Water-Damaged Wall Repair | $300–$800+ |
Professional repairs often include labor, materials, sanding, and painting, but always ask what’s included before accepting a quote.
Money-Saving Tip: If you’re already repainting a room, repairing small wall holes yourself can save hundreds of dollars.
12. DIY vs. Hiring a Professional: Which Is Better?
Not every wall repair requires a contractor. Many homeowners can achieve great results with basic tools and a little patience.
DIY Is a Great Choice If:
- The hole is smaller than 6 inches.
- The wall is dry and structurally sound.
- You have basic DIY tools.
- You’re comfortable painting afterward.
- You’re looking to save money.
Advantages
- Lower cost
- Learn a useful home maintenance skill
- Repairs can often be finished in a single day
- No scheduling or labor fees
Hire a Professional If:
- The wall has water damage.
- Mold is present.
- The hole is very large.
- Electrical wiring or plumbing may be behind the wall.
- The wall is load-bearing or part of a textured finish that’s difficult to match.
Advantages
- Faster completion
- Professional-quality finish
- Reduced risk of future cracking
- Ideal for major repairs
For most everyday dents, screw holes, and accidental damage, DIY repairs are usually the more practical option.
13. Pro Tips to Make Your Wall Repair Last Longer
A repair shouldn’t just look good today—it should still look good months or years later. These simple habits can make a big difference.
Build Up Thin Layers
Avoid applying one thick coat of filler. Thin coats dry more evenly, reduce shrinkage, and are less likely to crack.
Let Each Coat Dry Fully
Rushing the drying process often leads to weak repairs. Always wait until the filler is completely dry before sanding or adding another coat.
Feather the Edges
Blend the repair several inches beyond the damaged area. This creates a smooth transition that becomes almost invisible after painting.
Use Primer Every Time
Primer seals the repaired surface and helps paint dry evenly. Skipping this step often leaves a dull patch that stands out.
Match the Paint Finish
Even if the color is correct, the wrong sheen (flat, eggshell, satin, or semi-gloss) can make the repair noticeable.
Sand Carefully
Use fine-grit sandpaper and avoid aggressive sanding. The goal is to smooth the repair, not wear away the surrounding paint.
Fix the Cause of the Damage
If a leaking pipe, loose door handle, or unstable shelf caused the hole, repair that issue before patching the wall.
Keep Extra Paint
Store a labeled container of leftover paint for future touch-ups. It makes minor repairs much easier later.
14. FAQs
What’s the easiest way to patch a hole in a wall?
Small holes can usually be repaired by cleaning the area, applying lightweight spackle, allowing it to dry, sanding it smooth, and repainting.
What is the best filler for wall holes?
Lightweight spackle works well for small holes, while joint compound is better for larger drywall repairs. Masonry filler should be used on concrete or brick walls.
Can I repair drywall without using a mesh patch?
Yes. Small nail and screw holes don’t require a patch. However, medium-sized holes usually need a mesh patch for added strength.
How long should wall filler dry before sanding?
Most lightweight fillers dry within 30 minutes to 2 hours, while traditional joint compounds may need up to 24 hours. Always check the product instructions.
Why is my wall repair still visible after painting?
This usually happens because:
- The repair wasn’t sanded smooth.
- Primer was skipped.
- The paint finish doesn’t match.
- The edges weren’t feathered properly.
Can I paint directly over spackle?
It’s possible, but it’s not recommended. Primer helps prevent uneven paint absorption and creates a more consistent finish.
How do I repair a deep hole in drywall?
Large holes should be cut into a clean square, supported with wooden backing strips, patched with a new drywall piece, taped, covered with joint compound, sanded, primed, and painted.
How can I make the repaired area completely invisible?
Apply multiple thin coats of compound, feather the edges, sand between coats, use primer, and finish with matching paint and sheen. Taking your time during these steps usually produces the best results.
Final Thoughts
Learning how to patch a hole in the wall is one of the most useful DIY skills any homeowner can have. Whether you’re repairing a tiny nail hole, fixing damage from moving furniture, or replacing a larger section of drywall, the process becomes much easier once you understand which repair method fits the type of damage.
The secret to a professional-looking repair isn’t expensive tools or advanced experience. It comes down to proper preparation, using the right materials, applying thin coats of filler, sanding patiently, and never skipping primer before painting.
Remember, every wall is different. Drywall, plaster, brick, and concrete each require slightly different techniques, so take a few moments to identify your wall type before you begin. A little extra care during the repair will help ensure the finished surface blends naturally with the rest of the wall.
With the right approach, even a damaged wall can look as though nothing ever happened. Take your time, follow each step carefully, and you’ll end up with a smooth, durable repair that restores both the appearance and value of your home.