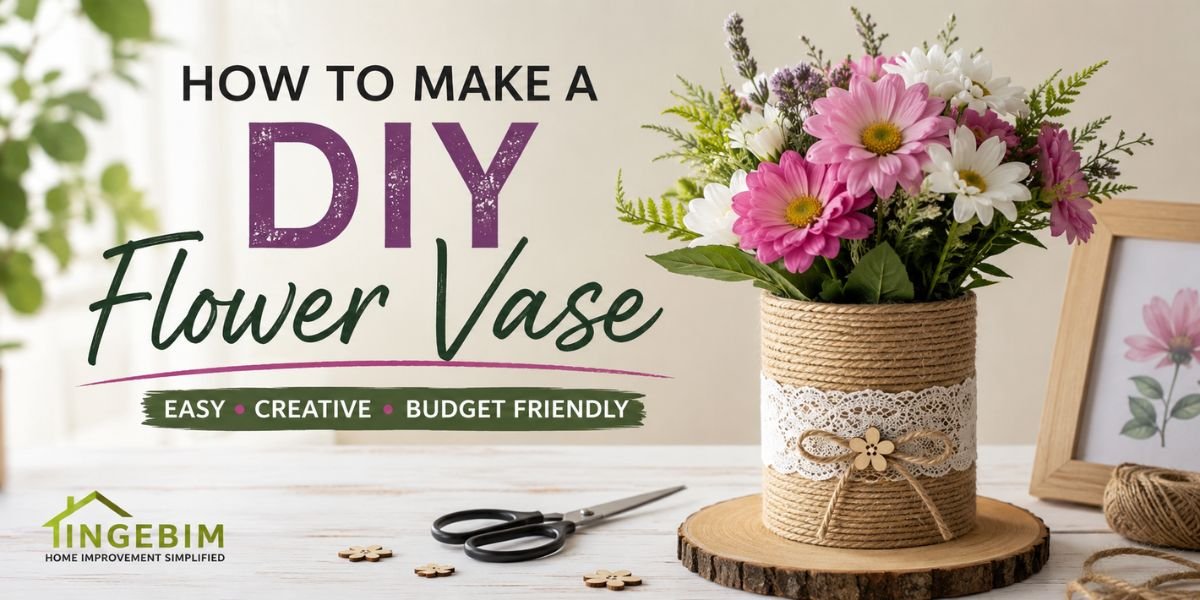
Flowers instantly make any room feel brighter, but an expensive vase isn’t always necessary. In fact, some of the most beautiful flower vases are made from items you probably already have at home.
An empty pasta sauce jar, a plastic bottle, old cardboard, scrapbook paper, or even leftover yarn can become a stylish vase with just a little creativity.
DIY flower vases are affordable, eco-friendly, and surprisingly fun to make. Whether you’re decorating your living room, creating a school project, making a Mother’s Day gift, or simply looking for an easy weekend craft, there’s a vase idea for every skill level.If you’re just starting your DIY journey, don’t miss our guide on DIY Home Improvement Projects for Beginners, where you’ll find more simple projects to build your confidence.
In this guide, I’ll show you several beginner-friendly methods, explain which materials work best, and share practical decorating tips so your finished vase looks professionally made.
Quick Answer
The easiest way to make a DIY flower vase is by cleaning a recycled glass jar, applying craft glue or Mod Podge, wrapping it with colorful yarn, twine, fabric, or pressed flowers, and allowing it to dry completely before adding fresh or artificial flowers. You can also make creative flower vases from plastic bottles, paper, cardboard, or recycled containers using simple craft supplies.
Why Make Your Own Flower Vase?
A homemade flower vase offers more than just decoration.
It allows you to recycle household items while adding a personal touch to your home.
Benefits include:
- Saves money
- Reduces household waste
- Perfect weekend DIY project
- Great activity for children
- Makes thoughtful handmade gifts
- Matches your home décor
- Easy for beginners
Whether your style is modern, rustic, farmhouse, or minimalist, a handmade vase can be customized to suit any room.
Choose the Right DIY Flower Vase Style
There isn’t just one way to make a flower vase.
Here are some of the most popular options.
1. Yarn-Wrapped Glass Vase
One of the easiest beginner projects.
Perfect for:
- Living room décor
- Dining tables
- Bedrooms
- Handmade gifts
Difficulty:
Time:
20–30 minutes
2. DIY Flower Vase Plastic Bottle
Don’t throw away empty plastic bottles.
With a little paint and creativity, they can look like expensive ceramic vases.
Perfect for:
- School projects
- Kids’ crafts
- Budget decorating
- Outdoor flowers
3. Paper Flower Vase
Paper crafts remain one of the most popular DIY projects.
Ideal for:
- Artificial flowers
- Classroom decorations
- Birthday parties
- Children’s activities
Since paper isn’t waterproof, it’s best used with artificial flowers unless you place a waterproof container inside.
4. Cardboard Flower Vase
Old shipping boxes can become beautiful decorative vases.
Simply cut the cardboard into your desired shape, glue the pieces together, and decorate with paint, wrapping paper, or fabric.
This option is lightweight, inexpensive, and environmentally friendly.
5. Pressed Flower Glass Vase
This elegant design looks like something you’d find in a boutique gift shop.
By attaching real pressed flowers to a glass jar using Mod Podge, you can create a unique vase that’s perfect for spring décor, weddings, or Mother’s Day gifts.
Materials You’ll Need
The supplies depend on the style you choose, but most DIY flower vase projects use inexpensive materials.
Basic Supplies
- Glass jar
- Plastic bottle
- Cardboard
- Thick paper or cardstock
- Yarn or twine
- Mod Podge or craft glue
- White glue (PVA)
- Acrylic paint
- Foam brush
- Scissors
- Hot glue gun
- Decorative ribbon
- Artificial or fresh flowers
Most of these items can already be found around your home.
Project 1 – Easy Yarn-Wrapped Glass Vase
This is one of the quickest DIY flower vase ideas for beginners.
What You’ll Need
- Clean glass jar
- Thick yarn
- Mod Podge
- Foam brush
- Scissors
- Ribbon (optional)
Step 1 – Prepare the Glass Jar
Wash the jar thoroughly with warm water and dish soap.
Remove every label and sticky residue.
Allow it to dry completely.
A clean surface helps the glue bond much better.
Step 2 – Apply the Glue
Using a foam brush, spread a thin layer of Mod Podge around the top section of the jar. If you’re new to decoupage crafts, the Mod Podge official website offers helpful product guides and creative project ideas.
Only cover a small section at a time.
This prevents the glue from drying before you begin wrapping.
Step 3 – Wrap the Yarn
Press the end of the yarn firmly into the wet glue.
Begin wrapping tightly around the jar.
Keep every row close together.
Avoid leaving gaps where the glass shows through.
Continue applying glue section by section until you reach the bottom.
Step 4 – Secure the End
Cut the yarn neatly.
Glue the final end firmly against the glass.
Allow the vase to dry for several hours.
Once dry, tie a decorative ribbon around the neck of the jar if you’d like an extra decorative touch.
Decorating Ideas
You can personalize your vase in countless ways.
Popular ideas include:
- Lace trim
- Burlap ribbon
- Wooden beads
- Twine bows
- Jute rope
- Faux pearls
- Glitter accents
- Dried lavender
Simple details often make the biggest impact.
Project 2 – Beautiful Pressed Flower Vase
If you love nature-inspired décor, this project is hard to beat.
Pressed flowers create a soft, elegant look that’s perfect for gifts or seasonal decorations.
Supplies
- Glass jar
- Mod Podge
- Foam brush
- Pressed flowers
- Leaves
- Clear acrylic sealer (optional)
Step 1 – Clean the Jar
Just like the yarn project, remove all labels and wash the glass thoroughly.
Dry completely before applying glue.
Step 2 – Apply Mod Podge
Brush a smooth, even layer over the outside of the jar.
Work in small sections so the adhesive stays wet while placing the flowers.
Step 3 – Arrange the Flowers
Carefully position the pressed flowers and leaves on the glued surface.
Use your fingertips or tweezers to flatten each piece gently.
Once you’re happy with the arrangement, brush another thin coat of Mod Podge over the top to seal everything in place.
Project 3 – DIY Flower Vase Using a Plastic Bottle
One of the easiest ways to recycle household waste is by turning an empty plastic bottle into a stylish flower vase. With a little paint and creativity, most people won’t even realize it started as a soda or water bottle.
This project is inexpensive, beginner-friendly, and ideal for both fresh and artificial flowers.
Materials You’ll Need
- Empty plastic bottle
- Utility knife or scissors
- Sandpaper
- Hot glue gun
- Small plastic lid (optional for the base)
- Acrylic or spray paint
- Decorative ribbon or jute rope
Step 1 – Cut the Bottle
Wash and dry the bottle thoroughly.
Using a sharp craft knife, cut the bottle to your desired height.
For a modern vase, leave the bottle tall.
For a small centerpiece, trim it shorter.
If children are helping, an adult should handle all cutting.
Step 2 – Smooth the Edges
Freshly cut plastic can be sharp.
Use fine-grit sandpaper to smooth the rim until it’s safe to handle.
Some DIY enthusiasts carefully soften the edge with gentle heat, but sanding is the safest option for beginners.
Step 3 – Paint the Vase
Apply a thin coat of primer if needed, then spray or brush on acrylic paint.
Popular color choices include:
- Matte white
- Black
- Sage green
- Terracotta
- Beige
- Gold
- Pastel pink
Allow the first coat to dry completely before applying a second coat for a smooth, professional finish.
Step 4 – Decorate
Once the paint has dried, personalize your vase with:
- Twine
- Burlap
- Lace
- Wooden beads
- Faux pearls
- Pressed flowers
- Vinyl decals
For artificial flowers, add decorative pebbles or sand inside the vase to keep stems upright.
Project 4 – How to Make a DIY Flower Vase with Paper
Paper flower vases are perfect for classrooms, birthday decorations, and craft sessions with children.
Since paper isn’t waterproof, use artificial flowers or place a small glass inside the paper vase if you want to display fresh flowers.
Supplies
- Cardstock or craft paper
- Glue
- Scissors
- Ruler
- Pencil
- Decorative paper
Step 1 – Create the Template
Draw a rectangle on cardstock and roll it into a cylinder.
Secure the edge with glue.
Cut a circular base and glue it firmly to the bottom.
Step 2 – Strengthen the Vase
For extra durability, glue a second layer of cardstock inside the vase.
This helps it hold its shape over time.
Step 3 – Decorate
This is the fun part.
Decorate using:
- Scrapbook paper
- Stickers
- Washi tape
- Glitter
- Paint
- Paper flowers
- Ribbon
The possibilities are endless.
Project 5 – How to Make a Flower Vase Out of Cardboard
Cardboard is another fantastic recycled material that can be transformed into stylish home décor.
Materials
- Corrugated cardboard
- Craft knife
- Hot glue
- Acrylic paint
- Decorative rope
- Sandpaper
Step 1 – Cut the Shape
Draw your preferred vase shape onto cardboard.
Cut two matching pieces.
Then cut several narrow strips to create the vase’s depth.
Step 2 – Assemble
Glue the strips between both side panels.
Allow the glue to dry completely before painting.
Step 3 – Finish the Surface
Paint the cardboard using acrylic paint.
Many DIY crafters also cover the surface with fabric, wallpaper, or textured paper for a premium look.
Flower Vase Ideas for School Projects
Teachers often encourage students to create crafts from recycled materials.
Easy school project ideas include:
- Plastic bottle vase
- Paper flower vase
- Cardboard vase
- Newspaper vase
- Ice cream stick vase
- Mason jar vase
- Tin can flower vase
These projects teach creativity while encouraging recycling.
Decorating Ideas to Make Your Vase Stand Out
The smallest details can completely transform a simple vase.
Try adding: Looking for more ways to decorate your living space? Explore our collection of Home Decor Ideas for creative inspiration that complements handmade crafts like this vase.
- Dried lavender
- Eucalyptus leaves
- Jute rope
- Lace ribbon
- Artificial butterflies
- Wooden buttons
- Seashells
- Pressed leaves
- Twinkle lights
- Mini chalkboard labels
Changing decorations with the seasons keeps your home feeling fresh all year.
Common DIY Flower Vase Mistakes
Avoid these common errors for a cleaner, more durable result.
Skipping Surface Preparation
Always clean glass or plastic before gluing or painting.
Dust and grease prevent adhesives from bonding properly.
Using Too Much Glue
A thick layer of glue often dries unevenly and leaves visible streaks.
Apply thin, even coats instead.
Rushing the Drying Time
Allow paint and glue to cure fully before adding flowers or water.
This helps prevent peeling and bubbling.
Choosing the Wrong Paint
For plastic bottles, use paint designed for plastic or apply a suitable primer first.
For glass jars, acrylic paint or spray paint works best.
Forgetting Waterproofing
Paper and cardboard vases should not hold water directly.
Place a glass or plastic container inside if you want to display fresh flowers.
How Much Does It Cost?
Most DIY flower vase projects are surprisingly affordable because they use recycled materials.
| Project | Estimated Cost |
|---|---|
| Yarn-Wrapped Glass Vase | $3–$10 |
| Pressed Flower Vase | $5–$15 |
| Plastic Bottle Vase | $2–$8 |
| Paper Flower Vase | $2–$6 |
| Cardboard Flower Vase | $2–$8 |
Many people can complete a beautiful vase using supplies they already have at home.
Caring for Your DIY Flower Vase
To keep your handmade vase looking its best:
- Wipe it regularly with a soft cloth.
- Avoid soaking painted or paper-covered surfaces.
- Replace water every two to three days when using fresh flowers.
- Store paper and cardboard vases in a dry place.
- Touch up paint if scratches appear over time.
With proper care, your DIY vase can remain a beautiful decoration for years.
Final Thoughts
Creating a DIY flower vase is one of the easiest and most rewarding craft projects you can do at home. It transforms everyday items into beautiful decorations while reducing waste and encouraging creativity. Whether you choose a yarn-wrapped glass jar, a painted plastic bottle, a pressed flower vase, or a paper design, each project allows you to add a personal touch to your home without spending much money.
These handmade vases also make thoughtful gifts for birthdays, Mother’s Day, weddings, and housewarmings. By using recycled materials and simple craft supplies, you can create unique pieces that reflect your style while supporting a more sustainable lifestyle.
With a little imagination and the step-by-step ideas in this guide, you’ll be able to create beautiful flower vases that brighten your home and impress family and friends. If you enjoy creating handmade home décor, you may also like our guide on How Hard Is House DIY Maintenance?, which shares practical tips for keeping your DIY projects looking their best year-round.