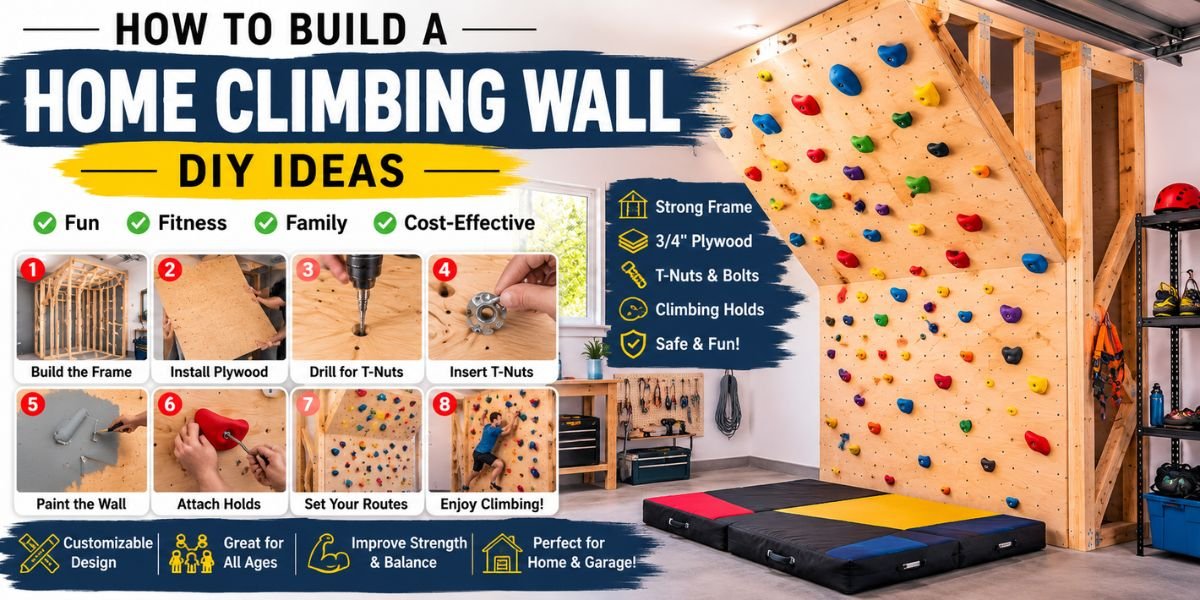
Imagine finishing work, walking into your garage, basement, or backyard, and having your own climbing gym waiting for you. No monthly membership. No driving across town. Just a climbing wall that’s available whenever you want to train.
Over the last few years, home climbing walls have become increasingly popular among families, fitness enthusiasts, and experienced climbers. They’re an excellent way to stay active, improve strength, and have fun without leaving home.
The good news is that building one isn’t nearly as complicated as most people think. If you’re new to DIY projects, start by reading our DIY Home Improvement Projects for Beginners guide before tackling a climbing wall.
If you have basic carpentry skills and the right materials, you can build a strong, safe climbing wall over a weekend.
In this guide, I’ll show you exactly how professionals build a DIY climbing wall, what materials to buy, how to install climbing holds correctly, and most importantly, how to build it safely.
Quick Answer
To build a DIY home climbing wall, create a sturdy frame using 2×4 or 2×6 lumber, attach ¾-inch structural plywood, drill 7/16-inch holes for 3/8-inch 4-prong T-nuts, mount the plywood securely to the frame, apply textured paint for grip, and install climbing holds using socket-head bolts. Always install thick crash pads underneath and ensure the wall is anchored securely to structural framing.
Why Build a Home Climbing Wall?
A climbing wall isn’t just for professional climbers.
It’s an excellent investment for families, fitness lovers, and children.
Benefits include:
- Full-body workout
- Improves grip strength
- Develops balance and coordination
- Builds confidence
- Great family activity
- Saves gym membership costs
- Can be customized anytime
Unlike traditional gym equipment, climbing never becomes boring because routes can be changed whenever you like.
Choosing the Right Type of Climbing Wall
Before buying materials, decide which style fits your home.
1. Indoor Rock Climbing Wall for Home
Perfect for:
- Garage
- Basement
- Spare room
- Home gym
Advantages:
- Protected from weather
- Lower maintenance
- Longer lifespan
- Can be used year-round
2. Outdoor Climbing Wall
Ideal if you have:
- Backyard
- Garden
- Side yard
Outdoor walls should always use:
- Exterior-grade plywood
- Weather-resistant paint
- Galvanized hardware
- Pressure-treated lumber
3. Freestanding Home Climbing Wall
A freestanding wall doesn’t attach directly to your house.
Instead, it uses an independent frame.
Best for:
- Renters
- Temporary setups
- Backyard climbing
- Portable climbing walls
Although more expensive, it offers greater flexibility.
Planning Your DIY Climbing Wall
Good planning prevents expensive mistakes. Before starting construction, it’s also worth learning How Hard Is House DIY Maintenance? to understand the long-term care involved in home projects.
Before cutting your first piece of wood, answer these questions.
How Much Space Do You Have?
A standard plywood sheet measures:
4 ft × 8 ft
Most homeowners start with:
- 8 ft wide
- 8 ft tall
If you have more room, multiple panels can be connected.
Ceiling Height
For adult climbing:
Minimum:
8 feet
Recommended:
10–12 feet
Higher ceilings allow for better route setting.
Wall Angle
This dramatically changes climbing difficulty.
Vertical Wall (90°)
Best for:
- Kids
- Beginners
- Small rooms
20°–30° Overhang
Great for:
- Intermediate climbers
- Home gyms
Provides more challenging routes without becoming overwhelming.
40°–45° Overhang
Preferred by experienced climbers.
Requires stronger framing because of the increased load.
Materials You’ll Need
A quality climbing wall starts with quality materials.
Lumber
- 2×4 studs
- 2×6 studs (recommended for overhangs)
Plywood
Always choose:
¾-inch structural plywood For more information about structural plywood grades and performance, refer to the APA – The Engineered Wood Association.
Good options include:
- ACX plywood
- Birch plywood
- Exterior plywood (for outdoor walls)
Avoid thin plywood because climbing holds can loosen over time.
Hardware
You’ll need:
- 3/8-inch 4-prong steel T-nuts
- Socket-head bolts
- Heavy-duty deck screws
- Wood screws
- Washers
Plan on installing approximately 50–60 T-nuts for every 4×8 plywood sheet.
Many experienced climbers install even more, allowing unlimited route combinations later.
Essential Tools
You don’t need a professional workshop.
Basic tools include:
- Circular saw
- Cordless drill
- Impact driver
- Stud finder
- Tape measure
- Speed square
- 7/16-inch drill bit
- Allen wrench
- Hammer
- Safety glasses
- Pencil
- Level
A miter saw makes framing easier but isn’t absolutely necessary.
Step 1 — Measure Your Space Carefully
Every successful DIY project begins with accurate measurements.
Check:
- Ceiling height
- Floor width
- Wall length
- Stud locations
- Electrical outlets
- Windows
- Lighting
Leave plenty of room around the wall for safe climbing and falls.
A cramped climbing area increases injury risk.
Step 2 — Build a Strong Wooden Frame
The frame carries all the climber’s weight.
This isn’t the place to cut corners.
Use either:
- 2×4 lumber
- 2×6 lumber
Space framing members:
16 inches on center
This provides excellent support for the plywood.
Locate existing wall studs with a stud finder.
Secure the frame using heavy-duty structural screws.
For overhanging climbing walls, construct an independent support frame anchored to both the floor and wall.
Step 3 — Prepare the Plywood Panels
Lay the plywood flat on sawhorses.
On the back side, draw a grid.
Professional builders usually space holes:
Every 8 to 12 inches
Drill every marked location using a:
7/16-inch drill bit
Keep the drill perfectly straight.
Crooked holes can make climbing holds difficult to tighten later.
Step 4 — Install the T-Nuts
Turn the plywood over.
Insert each 3/8-inch 4-prong T-nut into the drilled holes from the back.
Using a hammer, tap each T-nut firmly until it’s completely flush.
Double-check every T-nut before mounting the plywood.
Replacing loose T-nuts later is much harder.
Step 5 — Mount the Plywood
Lift each plywood sheet onto the frame.
Use heavy-duty deck screws every 8–12 inches along the framing.
Ensure:
- No gaps between panels
- Screws sit flush
- Panels don’t flex when pressure is applied
At this stage, your climbing wall should already feel extremely solid.
Step 6 – Paint the Climbing Wall for Better Grip
Once the plywood is securely mounted, it’s time to protect it.
Although many DIY builders leave the plywood unfinished, adding a textured paint improves durability and provides better friction for climbing shoes.
Best Paint Options
- Exterior acrylic paint
- Non-gloss latex paint
- Climbing wall friction paint
- Fine sand additive mixed into paint (optional)
Avoid glossy paints because they become slippery.
Before painting:
- Fill any gaps
- Sand rough edges
- Remove dust
- Apply one coat of primer
- Finish with two coats of textured paint
Allow the wall to cure for several days before installing climbing holds.
Step 7 – Install the Climbing Holds
This is where your project starts looking like a real climbing wall.
Using an Allen wrench, bolt each climbing hold into the T-nuts you installed earlier.
A good beginner wall includes:
- Large jugs
- Positive handholds
- Medium footholds
Advanced climbers usually add:
- Slopers
- Pinches
- Crimps
- Volumes
Don’t place every hold close together.
Instead, leave room to create multiple climbing routes later.
Many experienced route setters begin with around 25–40 holds per 4×8 panel, then add more as they become stronger.
DIY Climbing Wall Ideas
Every climbing wall should match the people who’ll use it.
Here are some popular designs.
1. Home Climbing Wall Kit
If you don’t want to source every part separately, a home climbing wall kit can save time.
Most kits include:
- Climbing holds
- T-nuts
- Bolts
- Installation hardware
You’ll still need to build the wooden frame yourself.
2. Indoor Rock Climbing Wall for Home
One of the easiest projects is converting part of a garage into a climbing gym.
Benefits include:
- Year-round climbing
- Protection from rain
- Easy lighting installation
- Climate control
A garage wall is often the perfect location because it’s already framed with structural studs.
3. Freestanding Home Climbing Wall
A freestanding climbing wall doesn’t rely on your house for support.
Instead, it uses a heavy-duty A-frame.
This design works well if:
- You’re renting
- You don’t want to drill into walls
- You may move the wall later
Although it costs more in lumber, it’s incredibly versatile.
4. DIY Climbing Wall for Adults
Adults generally prefer slightly overhanging walls.
Recommended angles include:
- 20°
- 30°
- 40°
Steeper walls require greater strength and create more interesting climbing problems.
If your space allows, adding a small roof section makes training even more effective.
5. How to Build a Climbing Wall for Kids at Home
Children don’t need difficult routes.
Focus on:
- Vertical walls
- Large colorful holds
- Low climbing height
- Thick crash mats
Kids benefit more from movement and confidence than difficult climbing grades.
Keep the wall under 8 feet tall and supervise young climbers at all times.
Choosing the Best Climbing Holds
Your wall is only as enjoyable as the holds you install.
Consider buying a mix of:
- Jugs
- Edges
- Pinches
- Slopers
- Pockets
- Footholds
Buying a variety allows you to change climbing routes without purchasing new hardware every few months.
How Many T-Nuts Do You Need?
One mistake many beginners make is installing too few T-nuts.
More holes mean more route options.
General recommendation:
| Wall Size | T-Nuts |
|---|---|
| 4×8 ft | 60–120 |
| 8×8 ft | 120–240 |
| Large garage wall | 300+ |
You’ll never regret having extra placement options.
How Much Does It Cost?
The total price depends on wall size and climbing holds.
Here’s a rough estimate for an 8×8-foot wall:
| Item | Estimated Cost |
|---|---|
| Lumber | $120–$220 |
| Plywood | $100–$180 |
| Screws & Hardware | $60–$120 |
| T-Nuts | $40–$80 |
| Climbing Holds | $150–$500 |
| Paint | $40–$80 |
| Crash Pads | $150–$500 |
Estimated Total: $700–$1,600
While this may seem expensive, it’s often less than one or two years of gym memberships for a family.
Essential Safety Tips
Safety should always come before climbing.Before using power tools or building structural projects at home, review the latest safety recommendations from OSHA (Occupational Safety and Health Administration).
Always:
Anchor the frame securely
Check bolts regularly
Tighten loose holds
Inspect plywood for cracks
Replace damaged holds
Use thick crash pads
Keep the landing area clear
Supervise children
Never climb above hard concrete without proper padding.
Common DIY Mistakes
Even experienced builders make mistakes.
Avoid these common problems:
Using Thin Plywood
Anything thinner than ¾ inch can flex under load.
Poor Frame Construction
The frame carries the climber’s weight—not the plywood.
Never skip structural screws or framing members.
Too Few T-Nuts
Adding more later is frustrating.
Install plenty during construction.
Cheap Hardware
Low-quality bolts eventually strip.
Buy climbing-specific hardware whenever possible.
Ignoring Fall Protection
Even experienced climbers fall unexpectedly.
Crash pads aren’t optional—they’re essential.
Maintenance Tips
A climbing wall requires very little maintenance.
Every month:
- Tighten bolts
- Check holds
- Vacuum chalk
- Inspect plywood
- Clean climbing holds with warm water
Every year:
- Repaint worn sections
- Replace damaged hardware
- Rotate climbing routes
Changing routes regularly keeps training challenging.
Final Thoughts
Building your own home climbing wall is one of the most rewarding DIY fitness projects you can tackle.
Whether you create a small vertical wall for children or a steep overhanging training board for serious climbing, careful planning and solid construction are the keys to success.
Use quality lumber, install plenty of T-nuts, secure every connection properly, and never compromise on safety. Once complete, you’ll have a custom climbing space that can provide years of exercise, skill development, and family fun—all without leaving home.
With a little creativity, you can also expand your wall over time by adding new holds, volumes, or adjustable overhangs, making it a project that grows alongside your climbing ability.Looking for more DIY inspiration? Explore our guides on DIY Home Improvement Projects for Beginners, How to Build a Backyard Skate Ramp, and Best Garage Storage Ideas to continue improving your home.
FAQs
Is it cheaper to build your own climbing wall?
Yes. Building a DIY home climbing wall is often much cheaper than purchasing a pre-built climbing wall. Depending on the size and materials, most homeowners spend between $700 and $1,600, while commercial climbing walls can cost several thousand dollars.
What plywood should I use for a climbing wall?
The best choice is ¾-inch structural plywood, such as ACX, birch, or exterior-grade plywood. It provides the strength needed to support climbing holds and works well with 3/8-inch T-nuts.
How many climbing holds do I need?
For a standard 4 × 8-foot wall, 25 to 40 holds are enough for beginners. If you want more route options, install 50 or more holds and plenty of extra T-nuts.
Can I build a climbing wall in my garage?
Yes. A garage is one of the best places for an indoor climbing wall because it usually has strong framing, high ceilings, and enough space for crash pads.
Are home climbing walls safe?
A properly built climbing wall can be very safe when attached to a solid frame and used with thick crash pads. Regularly inspect bolts, climbing holds, and the wooden structure for wear or damage.
What angle is best for beginners?
A vertical wall (90°) or a slight 10°–20° overhang is ideal for beginners. These angles are easier to climb and help develop technique before moving to steeper walls.
Can children use a home climbing wall?
Yes, but the wall should be designed specifically for kids with:
- Lower climbing heights
- Large, easy-to-grip holds
- Thick crash mats
- Adult supervision at all times
Do I need special climbing holds?
Yes. Use climbing holds made specifically for indoor or outdoor climbing walls. They are designed to withstand repeated use and fit standard T-nut bolt systems.
How long does it take to build a home climbing wall?
Most DIY builders can complete a basic climbing wall in one to three days, depending on its size, complexity, and whether the frame is attached to an existing wall or built as a freestanding structure.
Can I make my climbing wall bigger later?
Absolutely. Many homeowners begin with one 4 × 8-foot panel and expand over time by adding more plywood panels, additional framing, or adjustable overhang sections.