If you’ve got a wood stove, a fireplace, or you burn brush piles on your property, you’ve probably looked at that bucket of leftover ash and wondered if it’s good for anything besides the trash can. I get this question a lot from homeowners I work with on outdoor living projects — especially the ones running fire pits, wood-fired ovens, or heating with a wood stove all winter. The short answer is yes, and learning how to make DIY potash at home is one of those old-school skills that’s making a comeback, especially with people who garden, make their own soap, or just want to stop throwing away something that used to be valuable currency two hundred years ago.
Potash isn’t complicated to make, but there’s a right way and a wrong way to do it — and getting it wrong can mean a weak, useless product or, worse, a lye solution strong enough to burn your skin. I’ll walk you through exactly what potash is, what it’s used for, and how to make it safely in your own backyard using materials you probably already have.
Quick Answer
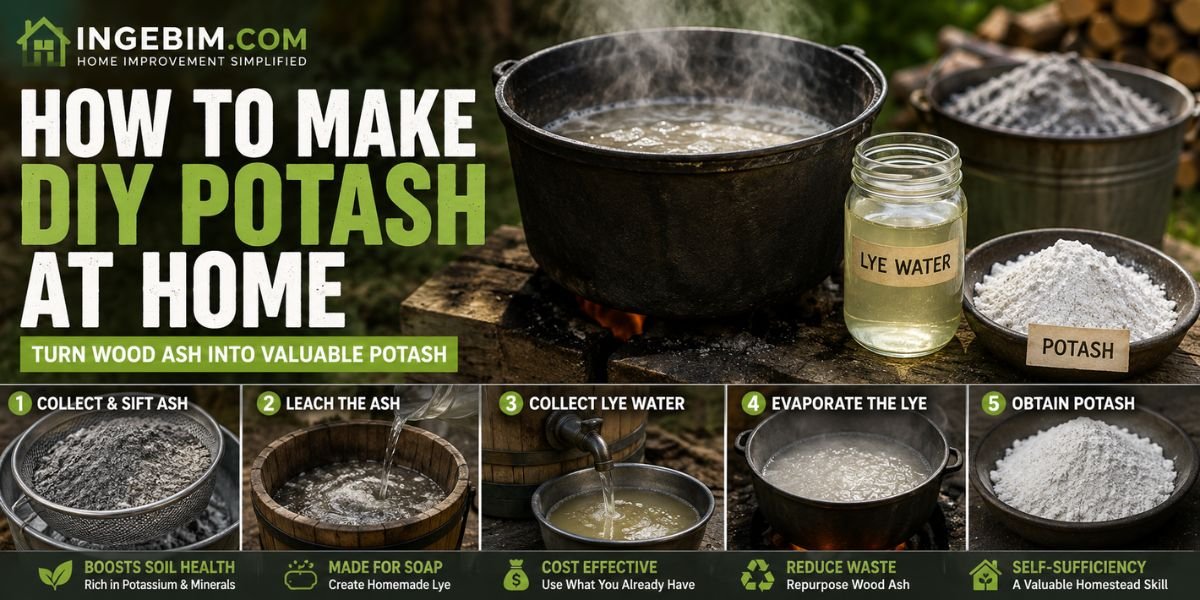
To make DIY potash at home, burn hardwood down to clean white-gray ash, sift out the charcoal chunks, then leach the ash by soaking it in rainwater. Strain the liquid (this is your lye water), then slowly evaporate it in a pot over low heat until only a dry, white-to-gray mineral residue remains. That residue is your potash. The whole process takes anywhere from a few hours to a couple of days, depending on how much ash you’re processing and how you evaporate the liquid.
What Is Potash, Exactly?
Potash is the common name for potassium carbonate, a water-soluble mineral compound that’s concentrated out of wood ash. Historically, it was made by boiling ashes in large iron pots — that’s literally where the name comes from (“pot ash”). Before synthetic fertilizers and industrial chemicals existed, potash was one of the most traded commodities in North America, used for everything from soap-making to glass production to fertilizing farmland.
For homeowners today, potash is mostly useful for:
- Boosting potassium and micronutrient levels in garden soil
- Making homemade lye for soap production
- Neutralizing acidic soil (similar to garden lime, though less commonly used this way)
- General cleaning and degreasing when mixed properly
It’s not the same thing as the “potash” mined commercially for large-scale agriculture (that’s typically potassium chloride), but the homemade version does a similar job for backyard gardens.
Benefits of Making Your Own Potash
It’s free. If you’re already burning wood for heat, cooking, or yard cleanup, you’re generating the raw material at no extra cost.
It reduces waste. Instead of bagging ash for the landfill, you’re repurposing it into something with actual value for your yard or workshop.
It’s a natural soil amendment. Wood ash potash adds potassium, calcium, and trace minerals back into garden beds, which is especially helpful if you’re growing vegetables that pull a lot of nutrients from the soil season after season.
It supports self-sufficiency projects. If you’re into homesteading, natural soap-making, or off-grid living, potash-based lye is a foundational ingredient you can produce entirely on your own property.
Drawbacks and Limitations
I’ll be straight with you — homemade potash isn’t a precision product. Unlike a bag of fertilizer with a guaranteed nutrient analysis on the label, your homemade batch will vary depending on what wood you burned, how hot the fire got, and how thoroughly you leached the ash. That inconsistency is fine for garden use but makes it a poor substitute if you need an exact concentration, like in certain soap recipes where lye strength has to be measured precisely.
It’s also labor-intensive compared to buying a bag of potash or lye at the store. And if you’re making it for soap, you’ll need to test the concentration with a hydrometer or the “egg float test” traditionally used by soapmakers, since homemade lye water strength isn’t standardized.
Materials Needed
- Clean hardwood ash (oak, maple, hickory, or fruitwoods work best — avoid ash from treated lumber, painted wood, or charcoal briquettes, which can contain chemicals you don’t want in your garden or soap)
- A large non-reactive container for leaching (a food-grade plastic bucket or a wooden barrel — never use aluminum, which reacts with lye)
- Rainwater or distilled water (tap water with high mineral content can affect results)
- A mesh strainer, cheesecloth, or a straw-lined barrel for filtering
- A cast iron or stainless-steel pot for evaporation (never aluminum)
- Heat-resistant gloves and eye protection
- A heat source (outdoor fire, propane burner, or stovetop reserved for non-food use)
Step-by-Step Guide
Skill Level: Beginner to intermediate — the process itself is simple, but handling concentrated lye water requires care.
Estimated Time: 4–8 hours of active work, spread over 1–3 days depending on drying and evaporation time.
Tools Required: Bucket, strainer, non-reactive pot, heat source, gloves, safety glasses.
Step 1: Collect and Sift Your Ash
Only use ash from clean, untreated hardwood. Softwoods like pine produce less potassium and more resin residue, so hardwood ash gives you a better yield. Sift out unburned charcoal chunks and debris using a mesh screen — you want fine, powdery ash.
Step 2: Set Up the Leaching Barrel
Drill a small hole near the bottom of a wooden barrel or bucket, or use a container with a spigot. Line the bottom with straw or gravel to act as a natural filter, then fill it with your sifted ash.
Step 3: Pour Water Through the Ash
Slowly pour rainwater over the ash, letting it soak through and drip out the bottom hole. This liquid is called “lye water” or “leachate.” Repeat this process, pouring the collected liquid back over the ash two or three times, to concentrate the potassium content.
Step 4: Test the Strength (Optional but Recommended)
Traditionally, homesteaders used the “egg float test” — if a fresh egg floats with about a quarter-sized portion showing above the surface, the lye water is roughly the right concentration for soap-making. For garden use, this step isn’t critical.
Step 5: Evaporate the Liquid
Pour the strained lye water into a cast iron or stainless-steel pot and simmer it over low heat outdoors (this process releases strong fumes, so good ventilation is non-negotiable). Continue simmering until the water evaporates and a dry mineral residue is left behind. This residue is your potash.
Step 6: Store It Properly
Let the potash cool completely, then transfer it to an airtight glass or plastic container. Potash absorbs moisture from the air, so a sealed container keeps it usable longer.
Common Mistakes to Avoid
- Using ash from treated or painted wood. This can introduce chemicals like arsenic or lead compounds into your potash, which is a serious problem if it ends up in garden soil or soap.
- Using aluminum containers. Lye reacts with aluminum and can produce hydrogen gas and dangerous fumes.
- Skipping ventilation during evaporation. The fumes released while boiling down lye water are caustic and shouldn’t be inhaled in an enclosed space.
- Applying homemade potash to soil without testing. Wood ash potash raises soil pH significantly. Adding too much can push your garden soil too alkaline, which hurts plants like blueberries, azaleas, and other acid-loving species.
- Not wearing protective gear. Lye water is corrosive to skin and eyes, even in relatively dilute form.
Safety Considerations
This is the section I don’t want anyone skipping. Lye, in any concentration, is a caustic substance. A few ground rules I follow on every project involving lye or ash processing:
- Always wear rubber gloves and safety glasses when handling leachate or evaporating it.
- Work outdoors or in a well-ventilated space — never boil lye water in your kitchen.
- Keep a container of vinegar nearby; it neutralizes lye splashes on skin (rinse with water first, then dab with diluted vinegar).
- Keep pets and children away from the work area and finished product.
- Label your stored potash clearly, since it can be mistaken for baking soda or flour.
Professional vs DIY: Is It Worth Making Your Own?
For garden use, DIY potash is a solid, low-cost option if you already generate wood ash from heating or cooking. It won’t match the precision of a bagged, lab-tested fertilizer, but it’s a reasonable soil amendment when used in moderation.
For soap-making, many experienced soapmakers still prefer store-bought sodium hydroxide (lye) because the concentration is guaranteed and consistent, which matters for recipe accuracy and safety. Homemade potash-based lye is more of a traditional or hobbyist approach — rewarding, but less predictable.
If your goal is simply reducing waste and getting some value out of ash you’re already producing, DIY is worth the time. If you need consistent, measurable results for a specific project, buying a commercial product may save you frustration.
Cost Breakdown
Since potash is typically made from ash you already have on hand, the direct cost is minimal. Here’s a general breakdown of what you might spend on equipment, keeping in mind that exact prices vary based on your location, local retailers, and whether you already own basic tools:
- Budget setup: Using items you likely already own (a bucket, an old pot, cheesecloth) — cost is close to $0–$20 for basics like gloves and a strainer.
- Mid-range setup: A dedicated leaching barrel with a spigot, a stainless-steel stockpot reserved for this purpose, and proper protective gear — typically $50–$150.
- Premium setup: A purpose-built ash hopper or leaching system, a dedicated outdoor burner, and lab-grade pH testing equipment for consistent results — often $150–$400 or more.
Buying commercial potash or lye, by comparison, generally runs a modest amount per pound at garden centers or soap-making suppliers, so the DIY route mainly pays off if you’re already generating ash as a byproduct of heating or cooking.
Maintenance and Storage Tips
- Store finished potash in an airtight container away from moisture — it’s hygroscopic and will clump or degrade if exposed to humid air.
- Keep your leaching barrel clean between batches to avoid contamination from old ash residue.
- If you’re producing potash regularly through the winter from a wood stove, consider a dedicated ash bucket system so you’re not mixing fresh, still-hot ash with cooled ash.
- Always let ash cool completely (at least 48 hours) before processing — hidden embers are a real fire risk.
Expert Recommendations
If you’re new to this, start small. Process a five-gallon bucket of ash before committing to a full barrel system. This lets you get a feel for how much lye water and finished potash you actually end up with, since yield varies a lot depending on wood type and burn temperature.
For garden use, I’d recommend having your soil tested before and after applying homemade potash. A basic soil test kit or a sample sent to your local agricultural extension office will tell you whether your soil actually needs the potassium boost and how your pH is trending. If you want a deeper reference on how wood ash affects soil chemistry over time, your local <a href=”https://www.epa.gov/” target=”_blank” rel=”noopener noreferrer”>EPA regional office</a> and state agricultural extension programs publish reliable, research-based guidance on safe application rates.
And if this is your first time working with any kind of homemade lye, it’s worth reading through our full <a href=”https://ingebim.com/fireplace-and-wood-stove-safety-guide” target=”_blank” rel=”noopener noreferrer”>fireplace and wood stove safety guide</a> here on IngeBIM, since safe ash handling starts well before you ever get to the leaching bucket.
Frequently Asked Questions
1. Can I use ash from any type of wood? Hardwood ash (oak, maple, birch, fruitwoods) produces the best yield of potassium. Avoid ash from treated lumber, painted wood, plywood, or charcoal briquettes, since these can contain chemicals that are unsafe for garden or soap use.
2. How much potash will I get from a bucket of ash? Yield varies significantly based on wood type, burn completeness, and leaching thoroughness, so it’s hard to give an exact figure — expect a relatively small amount of finished potash compared to your starting volume of ash, since most of the material is water-soluble minerals concentrated down through evaporation.
3. Is homemade potash the same as store-bought potassium fertilizer? Not exactly. Commercial potash fertilizers are processed and standardized for nutrient content. Homemade potash is more variable but still provides potassium, calcium, and trace minerals to soil.
4. Can I use wood ash directly on my garden instead of making potash? Yes, many gardeners apply wood ash directly in small amounts. Making potash concentrates the nutrients and removes some of the bulk material, but direct ash application is a simpler alternative if you’re not concerned with precision.
5. Is the lye water from this process dangerous? Yes, treat it as a caustic substance. It can burn skin and eyes on contact and should be handled with gloves and eye protection, similar to how you’d handle any commercial drain cleaner or lye product.
6. How do I know if my soil needs potash? A soil test is the only reliable way to know. Your local agricultural extension office can test your soil or point you to affordable home test kits.
7. Can I speed up the evaporation process? Yes, using a wider, shallow pan increases surface area and speeds evaporation, but this also means the caustic fumes disperse over a larger area, so ventilation becomes even more important.
8. How long does homemade potash last in storage? Stored in an airtight container away from moisture, it can last a long time, though it will slowly absorb humidity from the air over time and may need to be re-dried before use if it clumps.
Final Thoughts
Making DIY potash at home is a genuinely useful skill if you’re already burning wood for heat, cooking, or yard cleanup. It turns a waste product into something with real value for your garden or homestead projects, and it connects to a long tradition of homeowners getting more out of their property with what they already have on hand. That said, treat the process with the same respect you’d give any project involving caustic chemicals — good ventilation, protective gear, and clean, untreated wood ash are non-negotiable.
If you’re just getting started, run a small test batch first, get a feel for the process, and test your soil before applying anything to your garden beds. From there, scaling up is straightforward, and you’ll have a sustainable source of soil amendment that costs you next to nothing beyond the wood you’re already burning.