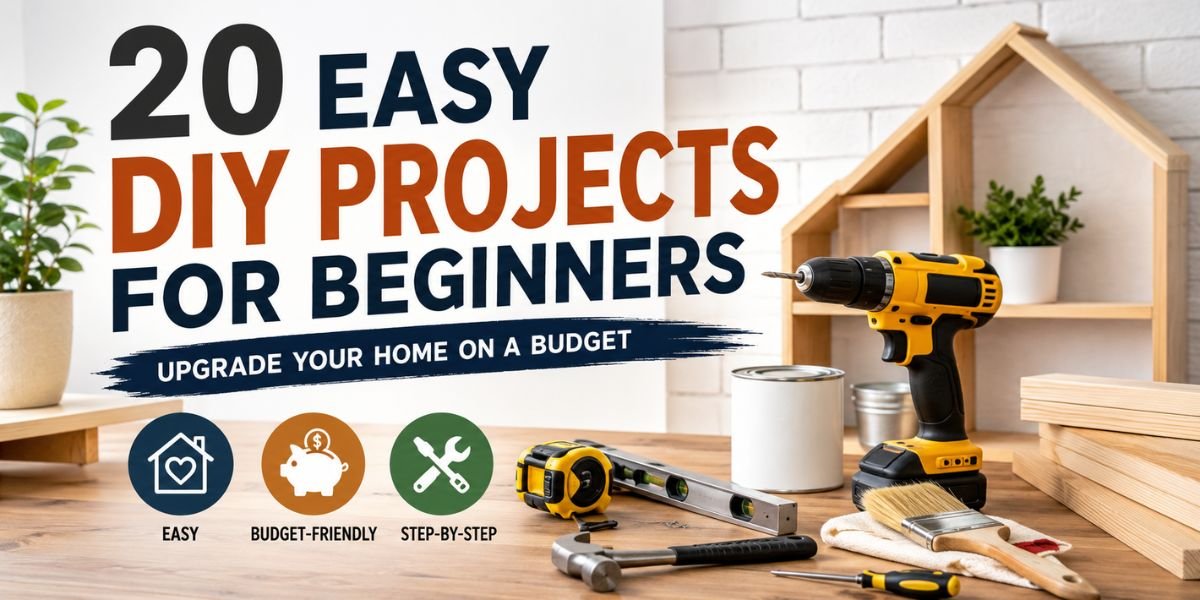
Why DIY Projects Are More Popular Than Ever
Home improvement doesn’t always require a contractor or a massive renovation budget.
In fact, some of the biggest transformations come from small weekend projects that cost less than a dinner out.
Whether you’ve recently bought your first home, moved into an apartment, or simply want to refresh your living space, beginner-friendly DIY projects are one of the easiest ways to improve your home’s appearance while learning valuable skills.f you’re completely new to home improvement, you may also want to explore our DIY Home Improvement Projects for Beginners guide before starting your first weekend project.
The best part?
Most projects require only basic tools, affordable materials, and a few hours of your weekend.
Besides saving money, DIY projects give you complete creative control. Instead of settling for mass-produced furniture or expensive décor, you can build pieces that match your own style and needs.
Before You Start Your First DIY Project
A little preparation makes every project easier.
Before picking up a paintbrush or drill, keep these simple tips in mind:
- Measure everything twice before cutting.
- Buy quality tools—they’ll last for years.
- Protect floors with drop cloths.
- Wear safety glasses and gloves when needed.
- Watch a few demonstrations if you’re trying something new.
- Start with cosmetic improvements before attempting structural work.
Remember, every experienced DIYer started as a beginner. For additional beginner-friendly repair ideas and tool recommendations, Family Handyman is another excellent resource.
1. Create a Peel-and-Stick Accent Wall
Why This Project Is Worth It
If one wall in your room feels plain or outdated, adding peel-and-stick wallpaper is one of the quickest ways to transform the entire space.
Unlike traditional wallpaper, modern peel-and-stick products are easy to reposition, making them perfect for beginners.
Estimated Cost
$35–$120
Time Required
2–4 Hours
Difficulty
Beginner
What You’ll Need
- Peel-and-stick wallpaper
- Measuring tape
- Utility knife
- Plastic smoother
- Level
Step-by-Step
- Clean the wall thoroughly.
- Measure the wall height.
- Cut wallpaper panels.
- Peel a small section of backing.
- Apply slowly from top to bottom.
- Smooth air bubbles as you go.
- Trim excess edges.
Pro Tip
Choose a wall that’s naturally the focal point of the room, such as behind the bed or sofa.
Common Mistake
Many beginners rush the installation and end up with crooked seams. Work slowly and check alignment every few inches.
2. Replace Old Cabinet Hardware
Sometimes the smallest changes create the biggest visual impact.
Replacing outdated cabinet knobs and drawer pulls instantly modernizes kitchens, bathrooms, and furniture without replacing the cabinets themselves.
Estimated Cost
$25–$90
Time Required
1–2 Hours
Difficulty
Beginner
Tools
- Screwdriver
- Measuring tape
- Cabinet hardware template
- New knobs or pulls
How to Do It
- Remove old hardware.
- Clean cabinet surfaces.
- Measure hole spacing.
- Install the new handles.
- Tighten everything securely.
Pro Tip
Choose one finish throughout the room, such as matte black, brushed brass, or satin nickel, for a clean, coordinated look.
Common Mistake
Buying handles without checking the existing hole spacing can lead to unnecessary drilling.
3. Build Simple Floating Shelves
Floating shelves add storage and style at the same time.
They’re perfect for displaying books, plants, framed photos, or decorative baskets.
Estimated Cost
$40–$150
Time Required
3–5 Hours
Difficulty
Easy
Materials
- Wood boards
- Shelf brackets
- Wall anchors
- Screws
- Drill
- Level
Steps
- Locate wall studs.
- Mark shelf height.
- Install brackets securely.
- Attach shelves.
- Check level before tightening.
Best Places
- Living room
- Kitchen
- Bathroom
- Laundry room
- Home office
Pro Tip
Stain natural wood instead of painting it if you want a timeless, high-end appearance.
4. Refresh Old Furniture with Paint
Don’t throw away old furniture.
Many pieces only need a fresh coat of paint to look brand new. If you’re looking for more furniture restoration techniques, This Old House offers detailed tutorials for homeowners.
An old dresser, side table, nightstand, or bookshelf can become a statement piece for a fraction of the cost of buying new furniture.
Estimated Cost
$30–$80
Time
One Weekend
Difficulty
Beginner
Supplies
- Sandpaper
- Primer
- Furniture paint
- Paint roller
- Paintbrush
- Protective finish
Process
- Clean thoroughly.
- Sand lightly.
- Apply primer.
- Paint two thin coats.
- Let dry completely.
- Add a protective topcoat.
Pro Tip
Matte finishes create a modern farmhouse look, while satin finishes are easier to clean.
5. Build a Functional Entryway Organizer
The entryway is the first thing guests see.
A simple wall organizer keeps shoes, bags, jackets, and keys neatly organized while making your home feel more welcoming.
Estimated Cost
$60–$180
Time
4–6 Hours
Difficulty
Easy
Materials
- Wooden board
- Coat hooks
- Small shelf
- Screws
- Wall anchors
- Paint or stain
Instructions
- Cut the board to size.
- Sand smooth.
- Paint or stain it.
- Install coat hooks.
- Add a narrow shelf.
- Mount securely to the wall.
Why Homeowners Love This Project
Instead of searching for keys every morning, everything has its own place. It’s a practical upgrade that also improves the appearance of your entryway.
Expert Tip
Install the organizer at a height that’s comfortable for every member of the family to use.
Why These First Five Projects Are Perfect for Beginners
These projects focus on improving your home’s appearance without requiring advanced carpentry, plumbing, or electrical skills. As you complete them, you’ll build confidence, learn how to use common tools safely, and develop techniques that make future DIY work much easier.
6. Build a Vertical Herb Garden
If you enjoy cooking, a vertical herb garden is one of the most rewarding DIY projects you can complete. Fresh herbs like basil, mint, parsley, and rosemary are always within reach, and the project doesn’t require a large backyard.
Even a small balcony, patio, or sunny kitchen wall can become a thriving herb garden.
Estimated Cost
$40–$120
Time Required
2–4 Hours
Difficulty
Beginner
Materials
- Wooden pallet or wall planter
- Small pots
- Potting soil
- Herb plants
- Screws
- Drill
How to Build It
- Sand the wooden pallet if necessary.
- Paint or stain it for outdoor protection.
- Secure it firmly to a wall or fence.
- Attach plant holders or shelves.
- Fill pots with quality soil.
- Plant your favorite herbs.
- Water regularly and place in sunlight.
Best Herbs for Beginners
- Basil
- Mint
- Rosemary
- Parsley
- Thyme
- Chives
Pro Tip
Label each herb with small wooden markers. It adds charm while helping everyone identify the plants.
Common Mistake
Overwatering is the biggest reason herbs die. Always check the soil before watering.
7. Apply Decorative Window Film
Not every room needs curtains.
Decorative window film adds privacy while still allowing natural light to enter your home. It’s perfect for bathrooms, front doors, home offices, and sidelights.
Many modern films even imitate frosted, stained, or etched glass at a fraction of the cost.
Estimated Cost
$20–$70
Time Required
1–2 Hours
Difficulty
Beginner
You’ll Need
- Privacy window film
- Spray bottle
- Water
- Mild soap
- Utility knife
- Squeegee
Installation Steps
- Clean the glass thoroughly.
- Measure the window.
- Cut the film slightly larger than the glass.
- Spray soapy water on the surface.
- Apply the film carefully.
- Remove bubbles using the squeegee.
- Trim excess edges.
Pro Tip
Apply the film on a cool day. Direct sunlight can make installation more difficult.
8. Build a Simple Wooden Entry Bench
A wooden bench gives guests a comfortable place to remove shoes while adding warmth to your home’s entrance.
You don’t need advanced woodworking skills. Basic lumber, screws, and a drill are enough for a sturdy beginner project.
Estimated Cost
$80–$180
Time Required
5–7 Hours
Difficulty
Easy
Materials
- 2×4 lumber
- Wood screws
- Drill
- Sander
- Paint or wood stain
- Measuring tape
Step-by-Step
- Measure your available space.
- Cut the wood according to your plan.
- Sand every edge.
- Assemble the frame.
- Attach the seat boards.
- Paint or stain the bench.
- Allow it to dry before use.
Pro Tip
Add a lower shelf for storing shoes or baskets.
Common Mistake
Skipping sanding can leave rough edges that snag clothing or cause splinters.
9. Create a Personalized Gallery Wall
Blank walls often make a room feel unfinished. If you’re looking for even more inspiration, browse our collection of Home Decor Ideas to find creative ways to personalize every room in your home.
A gallery wall lets you display family photos, artwork, travel memories, or inspirational prints while showing off your personality.
The best part is that you can update it anytime.
Estimated Cost
$30–$150
Time Required
2–3 Hours
Difficulty
Beginner
What You’ll Need
- Picture frames
- Measuring tape
- Painter’s tape
- Nails or picture hooks
- Level
How to Arrange It
- Lay all frames on the floor first.
- Experiment with different layouts.
- Mark positions using painter’s tape.
- Measure carefully.
- Hang the center frame first.
- Build outward evenly.
Design Tip
Use matching frame colors for a clean, modern look, or mix wood and metal finishes for a more eclectic style.
10. Install LED Under-Cabinet Lighting
Lighting can completely change the atmosphere of a room.
Installing LED strip lights beneath kitchen cabinets is one of the easiest upgrades that makes your kitchen look brighter, cleaner, and more expensive.
Many modern kits simply plug into a power outlet or use rechargeable batteries.
Estimated Cost
$40–$100
Time Required
1–2 Hours
Difficulty
Beginner
Materials
- LED strip lights
- Adhesive backing
- Power adapter or battery pack
- Cable clips
- Scissors
Installation Steps
- Clean the cabinet surface.
- Measure the installation area.
- Cut the LED strip where indicated.
- Peel the adhesive backing.
- Stick the strip underneath the cabinets.
- Connect the power supply.
- Hide cables using clips.
Pro Tip
Choose warm white lighting for a cozy kitchen or daylight white for better task lighting. Energy-efficient LED lighting can also help reduce electricity use over time. The U.S. Department of Energy explains the benefits of choosing LED lighting for your home.
Common Mistake
Installing lights too close to the cabinet edge can expose the strip and reduce the clean, hidden look.
DIY Budget Guide
One of the biggest myths about home improvement is that every project requires hundreds of dollars.
In reality, many beginner-friendly upgrades are surprisingly affordable.
Under $50
- Replace cabinet handles
- Apply decorative window film
- Paint old picture frames
- Install peel-and-stick backsplash
- Refresh flower pots with spray paint
Under $100
- Floating shelves
- Gallery wall
- LED cabinet lighting
- Furniture makeover
- Entryway organizer
Under $250
- Wooden entry bench
- Vertical herb garden
- Accent wall makeover
- Bathroom storage upgrades
- Patio decorating projects
No matter your budget, small improvements can dramatically change the way your home looks and feels.
11. Build a DIY Coffee Bar Station
If you’re tired of coffee mugs, sugar jars, and coffee pods taking over your kitchen counter, a dedicated coffee station is a simple weekend project that adds both organization and style.
Whether you use an old cabinet, a narrow console table, or a small rolling cart, you can create a café-inspired corner without spending hundreds of dollars.
Estimated Cost
$60–$180
Time Required
3–5 Hours
Difficulty
Beginner
Materials Needed
- Small cabinet or console table
- Floating shelf (optional)
- Wood screws
- Drill
- Paint or wood stain
- Decorative baskets
- Coffee mug hooks
Step-by-Step
- Choose an unused kitchen corner.
- Paint or stain the cabinet if needed.
- Install a floating shelf above it.
- Add hooks for mugs.
- Organize coffee, tea, sugar, and accessories.
- Decorate with a small plant or framed sign.
Pro Tip
Store coffee pods, filters, and spoons in matching baskets to keep the station looking neat.
12. Make a Custom Wooden Headboard
A stylish headboard can completely change the appearance of a bedroom, but buying one from a furniture store can be expensive.
With plywood or MDF panels and a little creativity, you can build one that perfectly matches your décor.
Estimated Cost
$80–$220
Time Required
5–7 Hours
Difficulty
Easy
Materials
- MDF or plywood
- Sandpaper
- Paint or stain
- Wood glue
- Screws
- Wall anchors
Instructions
- Measure the width of your bed.
- Cut the board to size.
- Sand all edges.
- Paint or stain the wood.
- Attach decorative trim if desired.
- Mount securely behind the bed.
Popular Styles
- Modern slat wall
- Rustic farmhouse
- Minimalist wood panel
- Upholstered fabric finish
Common Mistake
Skipping the sanding process can leave rough edges and an uneven paint finish.
13. Upgrade Bathroom Storage
Bathrooms often become cluttered because they lack storage.
Adding floating shelves, wall baskets, or an over-the-toilet cabinet helps organize towels, toiletries, and everyday essentials while making the room feel larger.
Estimated Cost
$50–$150
Time Required
2–4 Hours
Difficulty
Beginner
Materials
- Floating shelves
- Wall anchors
- Storage baskets
- Screws
- Level
- Drill
Steps
- Measure available wall space.
- Mark shelf positions.
- Install wall anchors.
- Secure the shelves.
- Organize items using baskets and containers.
Pro Tip
Use matching storage containers for a clean, hotel-inspired look.
14. Add Outdoor String Lights
Outdoor lighting is one of the easiest ways to make a backyard or patio feel warm and inviting.
Whether you’re hosting friends or relaxing after work, string lights instantly create a cozy atmosphere.
Estimated Cost
$40–$120
Time Required
2 Hours
Difficulty
Beginner
Materials
- Outdoor string lights
- Screw hooks
- Guide wire (for long spans)
- Zip ties
- Extension cord (if needed)
Installation
- Plan your lighting layout.
- Install screw hooks.
- Attach the guide wire.
- Hang the lights evenly.
- Plug them into a weatherproof outlet.
- Test the lighting after sunset.
Pro Tip
Choose warm white LED bulbs to create a welcoming glow while using less electricity.
15. Create a Cozy Reading Corner
Every home deserves a quiet place to relax.
A reading nook doesn’t require a large room. An unused corner, a comfortable chair, good lighting, and a small side table are enough to create your own peaceful retreat.
Estimated Cost
$100–$250
Time Required
3–4 Hours
Difficulty
⭐ Beginner
What You’ll Need
- Comfortable chair
- Floor lamp
- Small side table
- Throw blanket
- Cushions
- Bookshelf (optional)
Setup Steps
- Choose a quiet corner with natural light.
- Position the chair comfortably.
- Add a side table.
- Install good lighting.
- Decorate with plants, books, or artwork.
Pro Tip
Adding a soft rug makes the space feel even more inviting.
DIY Mistakes That Cost Beginners Money
Even simple projects can become expensive if you skip the basics. Here are some common mistakes to avoid:
1. Buying Cheap Tools
Low-quality tools wear out quickly and can make projects harder. Investing in reliable tools saves money over time.
2. Skipping Measurements
The saying “measure twice, cut once” exists for a reason. Taking accurate measurements prevents wasted materials.
3. Ignoring Surface Preparation
Painting over dusty walls or rough furniture usually leads to poor results. Cleaning and sanding first always pays off.
4. Rushing the Job
Allow paint, glue, or stain to dry completely before moving to the next step. Patience produces a better finish.
5. Forgetting Safety Gear
Safety glasses, gloves, and dust masks may seem unnecessary for small jobs, but they protect you from injuries and irritation.
Essential DIY Tools Every Beginner Should Own
Before tackling more advanced projects, consider building a basic toolkit with these essentials:
- Tape measure
- Hammer
- Cordless drill
- Screwdriver set
- Adjustable wrench
- Utility knife
- Spirit level
- Stud finder
- Sandpaper
- Paintbrushes and rollers
- Safety glasses
- Work gloves
Having these tools on hand makes future projects faster and more enjoyable.
16. Build a DIY Shoe Storage Bench
Shoes scattered around the front door can make even a clean home feel messy. A simple storage bench solves two problems at once—it provides a comfortable place to sit while putting on shoes and keeps footwear neatly organized.
Estimated Cost
$80–$180
Time Required
5–6 Hours
Difficulty
Easy
Materials
- Plywood or solid wood boards
- Wood screws
- Drill
- Sandpaper
- Paint or stain
- Wood glue
Steps
- Measure your entryway.
- Cut the wood according to your design.
- Assemble the frame.
- Add shelves underneath.
- Sand every surface.
- Paint or stain.
- Let it dry before placing shoes inside.
Pro Tip
Use storage baskets on the lower shelf to keep smaller items organized.
17. Install Peel-and-Stick Kitchen Backsplash
Want your kitchen to look modern without paying for expensive tile installation?
Peel-and-stick backsplash panels are one of the easiest weekend upgrades for beginners.
Estimated Cost
$50–$150
Time Required
2–3 Hours
Difficulty
Beginner
Materials
- Peel-and-stick backsplash tiles
- Measuring tape
- Utility knife
- Level
- Cleaning cloth
Instructions
- Clean the wall completely.
- Measure carefully.
- Cut tiles where needed.
- Peel the backing.
- Apply slowly while pressing firmly.
- Trim around outlets if necessary.
Pro Tip
Choose subway tile or marble-look panels for a timeless appearance.
18. Create a Backyard Fire Pit Area
If you enjoy spending evenings outdoors, a simple fire pit creates a cozy gathering place for family and friends.
Many DIY fire pit kits require very little construction experience.
Estimated Cost
$150–$300
Time Required
One Weekend
Difficulty
Easy
Materials
- Fire pit blocks
- Gravel
- Shovel
- Landscape fabric
- Level
Basic Steps
- Select a safe location away from structures.
- Remove grass.
- Add landscape fabric.
- Pour gravel.
- Stack fire pit blocks.
- Check for level.
- Add chairs around the fire pit.
Safety Tip
Always check your local fire regulations before building an outdoor fire pit.
19. Make Decorative Wooden Wall Art
Wall art doesn’t have to be expensive.
Using leftover wood pieces, you can create modern geometric designs, rustic signs, or decorative panels that give your room a custom look.
Estimated Cost
$20–$80
Time Required
2–4 Hours
Difficulty
Beginner
Materials
- Scrap wood
- Wood glue
- Paint or stain
- Sandpaper
- Hanging hardware
Ideas
- Chevron design
- Mountain landscape
- Geometric patterns
- Rustic welcome sign
- Family name plaque
20. Refresh Your Patio with DIY Planters
Plants instantly make any outdoor space feel more inviting.
Instead of buying expensive decorative pots, create your own planters using wooden crates, concrete molds, or recycled containers.
Estimated Cost
$30–$100
Time Required
2–3 Hours
Difficulty
Beginner
Materials
- Wooden crates or planters
- Exterior paint
- Potting soil
- Flowers or herbs
- Drill (for drainage holes)
Best Plants
- Lavender
- Ferns
- Petunias
- Succulents
- Snake Plant
- Rosemary
DIY Projects That Can Increase Your Home’s Value
Not every DIY project offers the same return on investment. If you’re thinking about selling your home in the future, focus on improvements that enhance both appearance and functionality.
Some of the most valuable beginner-friendly projects include:
- Updating cabinet hardware
- Installing floating shelves
- Painting walls in neutral colors
- Improving outdoor lighting
- Creating an organized entryway
- Refreshing kitchen backsplashes
- Adding bathroom storage
- Building simple landscaping features
These upgrades make a home feel cleaner, more modern, and better maintained—qualities that appeal to many buyers.
DIY Safety Tips Every Beginner Should Follow
Before starting any project, keep safety in mind.
- Wear safety glasses when cutting or drilling.
- Use gloves when handling rough materials or chemicals.
- Work in a well-ventilated area when painting.
- Keep children and pets away from active work areas.
- Read the instructions for every tool before using it.
- Never overload electrical outlets when using power tools.
- Take your time—rushing often leads to mistakes.
A successful DIY project is one that’s completed safely as well as beautifully.
Final Thoughts
You don’t need years of experience or a garage full of expensive tools to improve your home.
The best DIY projects start with simple ideas, realistic budgets, and a willingness to learn. Every shelf you install, every piece of furniture you restore, and every room you refresh builds confidence for the next project.
Start with one project that fits your budget and skill level. As your experience grows, you’ll discover that many home improvements are easier than they first appear. Wondering what comes next? Read our guide on How Hard Is House DIY Maintenance? to understand which tasks homeowners can confidently handle themselves throughout the year.
Remember, DIY isn’t about perfection—it’s about creating a home that reflects your personality while saving money and learning valuable skills along the way.
FAQs
What is the easiest DIY project for beginners?
Replacing cabinet handles, painting furniture, and installing peel-and-stick wallpaper are among the easiest projects to start with.
How much should I budget for my first DIY project?
Many beginner projects cost between $30 and $100, depending on the materials you choose.
What tools should every beginner own?
A cordless drill, hammer, tape measure, screwdriver set, utility knife, level, and safety glasses are excellent starting tools.
Can DIY projects really save money?
Yes. Completing simple home improvements yourself can reduce labor costs while helping you develop practical skills for future projects.
Which DIY project adds the most value?
Kitchen upgrades, fresh paint, better lighting, improved storage, and attractive landscaping often provide the best return on investment.