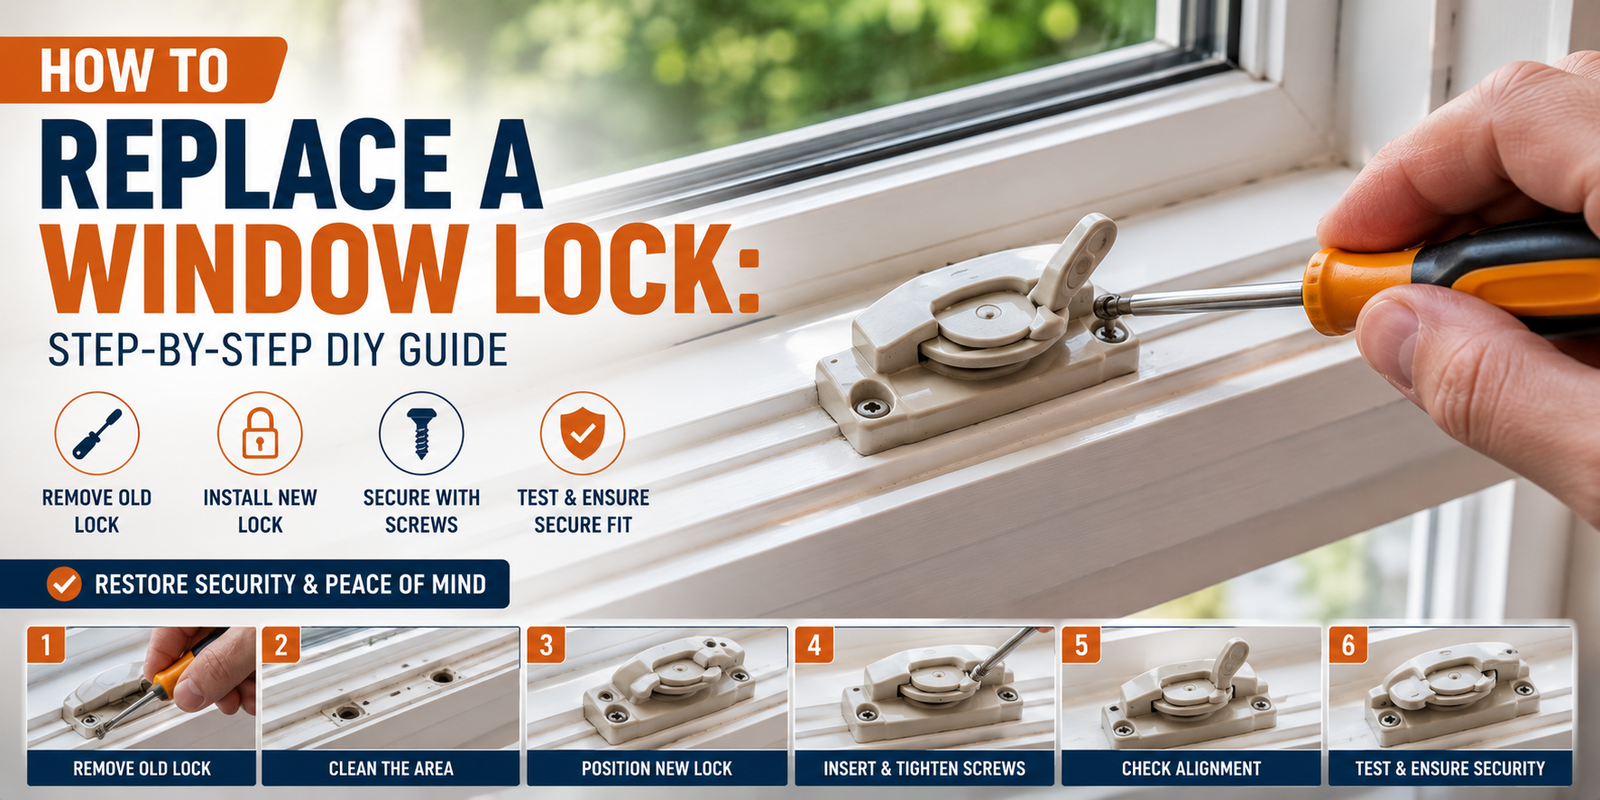
A broken or worn window lock is more than an annoying little hardware problem. A window that doesn’t lock properly can affect security, create drafts, and make it difficult to keep the sash securely closed.
The good news is that many basic window locks can be replaced without replacing the entire window. If the frame and sash are still in good condition, installing a compatible replacement lock may be all that’s needed.
However, choosing the correct lock is the most important part of the job. Window hardware varies by window style, manufacturer, model, age, and design.
In this guide, I’ll show you how to identify the right replacement lock, remove the old one, install the new hardware, and test it properly.
Quick Answer
To replace a window lock, first identify your window type and the existing lock. Buy a compatible replacement, then remove the old lock by taking out its mounting screws. Position the new lock in the same location, secure it with the correct screws, and test it with the window fully closed.
If the lock doesn’t align with the keeper after installation, adjust the hardware or investigate whether the sash itself is out of alignment.
When Should You Replace a Window Lock?
Not every window-lock problem requires replacement.
You may need a new lock if the existing one is:
- Cracked
- Broken
- Heavily corroded
- Missing internal components
- Unable to engage the keeper
- Loose despite properly tightened screws
- Physically damaged
- Worn enough that it no longer holds securely
If the problem is simply a loose screw or misalignment, you may be able to repair the existing lock instead.
For that situation, see our guide on How to Fix a Window Lock That Won’t Work.
What You Need to Replace a Window Lock
The exact tools depend on the window and lock design.
For a basic replacement, you may need:
- Replacement window lock
- Compatible keeper
- Phillips screwdriver
- Flathead screwdriver
- Measuring tape
- Small drill/driver if required
- Pencil
- Cleaning cloth
- Safety glasses
Keep the original screws until you know whether the new hardware uses the same fasteners.
Important: Don’t assume every window lock uses the same screw size or mounting pattern.
Step 1: Identify Your Window Type
Before ordering a replacement lock, determine what type of window you have.
Common types include:
- Double-hung
- Single-hung
- Sliding
- Casement
- Awning
- Tilt-and-turn
- uPVC windows
The locking mechanism can be completely different between these designs.
For example, a double-hung window may use a sash lock and keeper, while a casement window may use a multi-point or operating lock mechanism.
Step 2: Identify the Existing Lock
Look closely at the existing hardware.
Check:
- Lock shape
- Manufacturer
- Screw-hole spacing
- Overall dimensions
- Handle style
- Keeper design
- Lock position
- Window model or series
If you know the manufacturer, look for a model number, serial number, or product identification information.
For example, Marvin provides guidance for identifying its windows before ordering replacement parts, which is useful when you aren’t sure which hardware belongs to your window.
You can check Marvin’s official replacement-parts guidance when dealing with a Marvin window.
Step 3: Measure the Existing Lock
Before ordering the replacement, measure the old hardware.
Record:
- Overall length
- Overall width
- Screw-hole spacing
- Mounting position
- Keeper dimensions
- Lock projection
Take a clear photograph of the old lock as well.
Having both measurements and a photo makes it easier to compare replacement options.
Pro Tip
Don’t remove the old lock before you’ve identified what replacement you need.
If the existing hardware is still installed, you can use it as a reference.
Step 4: Check the Keeper
The lock isn’t the only part that matters.
The keeper is the component that the lock catches or engages with when the window closes.
Inspect it for:
- Bending
- Cracks
- Corrosion
- Loose screws
- Incorrect positioning
- Missing components
A new lock won’t necessarily solve the problem if the keeper is damaged or badly misaligned.
If the keeper is also damaged, replace both components where appropriate.
Step 5: Buy the Correct Replacement Lock
Once you’ve identified the window and hardware, purchase a compatible replacement.
Don’t choose a lock simply because it looks similar.
Check:
- Window manufacturer
- Window series
- Window type
- Lock dimensions
- Screw-hole pattern
- Handing, if applicable
- Keeper compatibility
Marvin’s replacement-parts information explains that identifying the window and its product information can help homeowners obtain the correct replacement components.
Step 6: Open the Window
Before removing the old lock, open the window enough to access the hardware safely.
If the window is difficult to operate, don’t force it.
You can first check our guide on How to Fix a Window That Is Hard to Open.
For some window designs, the sash may need to remain supported during hardware replacement.
Never work underneath an unsupported sash.
Step 7: Remove the Old Lock
Use the correct screwdriver to remove the mounting screws.
Keep the screws in a small container so they don’t get lost.
Once all mounting screws have been removed, carefully lift the old lock away from the window.
Inspect the area underneath it.
Look for:
- Rot
- Cracks
- Stripped holes
- Dirt
- Corrosion
- Damaged wood
- Paint buildup
If the mounting surface is damaged, fix that issue before installing the replacement.
Step 8: Clean the Mounting Area
Before installing the new lock, clean the area around the mounting holes.
Remove:
- Dust
- Dirt
- Old debris
- Loose paint
- Corrosion
Don’t aggressively sand the area unless necessary.
The replacement lock needs to sit flat against the mounting surface.
Step 9: Position the New Lock
Place the new lock in the same general position as the old one.
Line up the mounting holes.
If the replacement lock uses the original holes, installation is usually straightforward.
If the holes don’t line up, stop and verify that you purchased the correct replacement.
Don’t immediately drill new holes just to make an incompatible lock fit.
Step 10: Install the Mounting Screws
Insert the correct screws and tighten them gradually.
Start each screw before fully tightening any of them.
This allows you to make small alignment corrections.
Tighten the screws firmly, but don’t overtighten them.
Overtightening can:
- Strip screw holes
- Damage plastic components
- Crack older wood
- Distort the lock housing
Step 11: Check the Keeper Alignment
Close the window slowly.
Look at the relationship between the new lock and keeper.
They should line up correctly.
If the lock sits too high, too low, or too far to one side, it may not engage correctly.
Make small adjustments if the hardware design allows them.
Step 12: Test the New Lock
With the window fully closed, operate the lock.
Check that:
- The lock moves smoothly.
- The lock engages completely.
- The keeper catches correctly.
- The sash doesn’t move excessively.
- The lock doesn’t require unusual force.
Open the window again and repeat the test.
Don’t consider the job finished until the lock works consistently.
What If the New Window Lock Doesn’t Fit?
This happens more often than homeowners expect.
Possible reasons include:
- Wrong window model
- Wrong lock type
- Incorrect screw spacing
- Different keeper design
- Different window generation
- Wrong handing
- Incorrect dimensions
Don’t modify the replacement lock just to make it fit.
Instead, recheck the window identification and hardware measurements.
If you are dealing with a manufacturer-specific window, consult the manufacturer’s replacement-parts information. For example, Marvin provides product-identification information specifically to help customers order appropriate replacement parts.
How to Replace a Window Lock and Keeper
If both components are damaged, replacing them together can make sense.
Step 1
Remove the old lock.
Step 2
Remove the old keeper.
Step 3
Clean both mounting areas.
Step 4
Position the replacement keeper.
Step 5
Secure the keeper with the correct screws.
Step 6
Install the new lock.
Step 7
Close the window slowly.
Step 8
Check that the lock and keeper engage correctly.
The two parts need to work together, so don’t adjust one without checking the other.
What If the Screw Holes Are Stripped?
Older wooden windows sometimes develop damaged screw holes.
If the screws no longer grip properly, don’t simply keep tightening them.
Depending on the damage, the mounting area may need to be repaired before installing the new lock.
For minor damage, a suitable wood-repair method may restore the mounting surface.
For severe deterioration or rotten wood, professional repair may be necessary.
What If the Window Still Won’t Lock?
If you’ve installed a new lock but the window still won’t secure properly, investigate the alignment.
Possible causes include:
- Bent keeper
- Incorrect keeper position
- Warped sash
- Swollen frame
- Damaged mounting surface
- Incorrect lock
- Window frame movement
A new lock cannot compensate for a severely misaligned window.
Window Lock vs. Window Keeper
It’s easy to confuse these two parts.
Window Lock
The lock is the moving hardware operated by the homeowner.
Window Keeper
The keeper is the stationary component that receives or catches the lock.
Both need to align correctly.
If the lock moves but doesn’t catch, the keeper may be the actual problem.
How to Maintain a New Window Lock
Once you’ve installed the new hardware, don’t forget about maintenance.
Every few months:
- Check the mounting screws.
- Test the lock.
- Inspect the keeper.
- Remove visible dirt.
- Look for corrosion.
- Check the window alignment.
- Avoid forcing the lock.
If the surrounding window becomes difficult to operate, address that problem before it puts extra pressure on the lock.
Common Mistakes to Avoid
Buying the Wrong Lock
Appearance alone isn’t enough.
Always compare the dimensions and mounting pattern.
Ignoring the Keeper
A new lock won’t fix a damaged or badly positioned keeper.
Overtightening Screws
Too much force can damage the mounting surface.
Drilling New Holes Immediately
If the holes don’t match, verify the replacement part before modifying the window.
Forcing the Lock
A lock should engage smoothly.
If it requires excessive force, investigate alignment.
Ignoring Frame Damage
Rotten or warped wood can make a new lock unreliable.
When Should You Call a Professional?
A window lock replacement is often a manageable DIY project, but professional help is a better choice when:
- The window frame is badly damaged.
- The sash is severely warped.
- The glass is damaged.
- The lock is part of a complicated multi-point system.
- The window is on an upper floor and difficult to access.
- You can’t identify the correct replacement.
- The mounting area is badly rotten.
- The replacement requires major modification.
For complex window systems, using the manufacturer’s installation instructions is especially important.
Contractor’s Tip
Always identify the window before buying the lock.
This is the mistake I see most often with replacement hardware.
Two locks can look almost identical but have different screw spacing, keeper positions, or internal mechanisms.
Spend five minutes measuring and identifying the existing hardware before ordering. It can save you from buying the wrong part and having to repeat the job.
Final Thoughts
Replacing a window lock doesn’t have to mean replacing the entire window.
If the frame and sash are in good condition, a compatible replacement lock can restore proper security and operation.
The most important steps are correct identification, accurate measurements, careful installation, and proper alignment.
Don’t rush the process. A lock that looks correctly installed isn’t necessarily working correctly until you’ve tested it several times with the window fully closed.
If the problem continues after installing the new lock, check the keeper and window alignment before assuming the replacement hardware is defective.
FAQs
Can I replace a window lock myself?
Yes. Many basic sash locks and similar window hardware can be replaced as a DIY project with basic hand tools.
How do I know what replacement window lock I need?
Identify the window manufacturer, model or series, window type, lock dimensions, screw-hole spacing, and keeper design.
Do all window locks fit the same windows?
No. Window locks vary considerably between manufacturers and window types.
Should I replace the keeper when replacing the lock?
Not always. If the keeper is in good condition and aligns correctly, it may not need replacement. If it’s bent, damaged, or badly worn, replacing it may be appropriate.
What tools do I need?
For many basic replacements, a Phillips screwdriver, measuring tape, and replacement hardware are enough. Some windows may require additional tools.
Why won’t my new window lock catch?
The lock and keeper may be misaligned, the wrong replacement may have been purchased, or the sash/frame may have shifted.
Can I use the old screws?
Sometimes. Use them only if they’re compatible with the replacement hardware and remain in good condition. Follow the replacement manufacturer’s instructions.
What should I do if the screw holes are stripped?
Repair the mounting surface before reinstalling the lock. Don’t rely on repeatedly tightening loose screws.
How often should window locks be replaced?
There isn’t a fixed schedule. Replace a lock when it’s damaged, worn, corroded, or no longer secures the window properly.