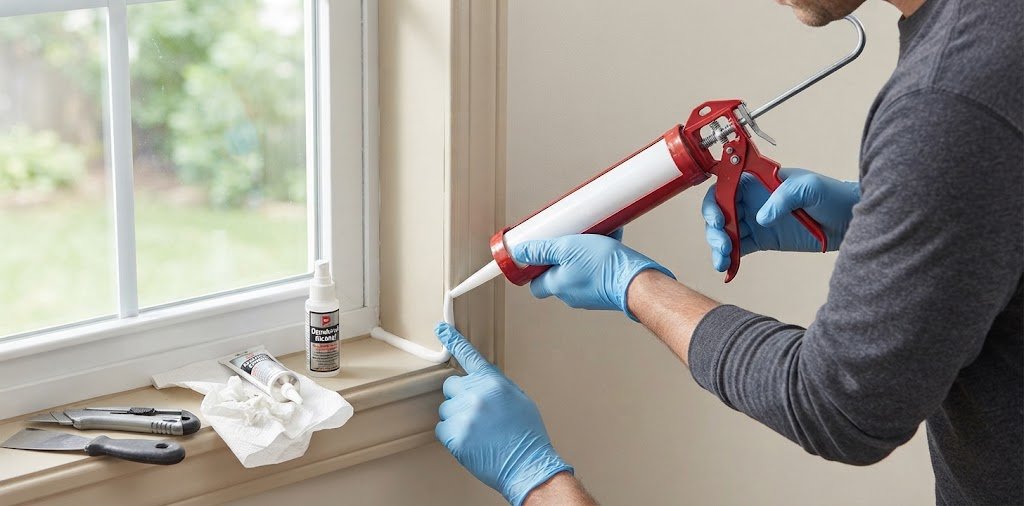
Cracked, peeling, or missing caulk around a window isn’t just a cosmetic problem. Damaged sealant can allow drafts and rainwater to enter around the frame, especially during bad weather.
The good news is that replacing old window caulk is one of the more manageable DIY window-maintenance jobs. With the right sealant, a sharp utility knife, and a little patience, you can refresh a deteriorated joint without replacing the entire window.
But there’s an important rule: don’t simply cover old, failing caulk with a new layer. The old material should be removed and the surface cleaned and dried first so the new sealant can adhere properly. DAP’s window-sealing guidance also recommends removing old sealant and preparing a clean, dry surface before applying new material.
Quick Answer
To replace window caulk, remove the old cracked sealant, clean the joint, let it dry completely, choose a sealant suitable for the location, apply a continuous bead, smooth it, and allow it to cure according to the manufacturer’s instructions.
For exterior windows, use a product specifically designed for outdoor exposure and compatible with your window and surrounding materials.
When Should You Replace Window Caulk?
You don’t need to replace window caulk simply because it looks old.
Look for actual signs of failure, including:
- Cracks
- Gaps
- Peeling
- Shrinking
- Brittle sealant
- Caulk pulling away from the frame
- Water getting through the joint
- Noticeable drafts
- Damaged or missing sections
If you can see daylight through a joint or the sealant has separated from the window frame, it’s worth investigating.
If you’re already dealing with water entering around the window, read our guide on How to Fix Water Leaking Around a Window before simply applying new caulk.
What Type of Caulk Should You Use Around Windows?
This is one of the most important decisions.
There isn’t one caulk that’s ideal for every situation.
Exterior Windows
Choose an exterior-rated sealant designed for windows, doors, siding, or trim.
Look for:
- Weather resistance
- Flexibility
- Strong adhesion
- Water resistance
- Compatibility with the window material
Interior Window Trim
For interior trim, an appropriate acrylic latex or siliconized sealant may be suitable, particularly when the joint will be painted.
Silicone
Silicone sealants can provide a flexible, water-resistant seal, but not every silicone product is paintable.
Always read the manufacturer’s label before buying.
For example, DAP’s technical information distinguishes between different sealant products and their intended applications, substrates, curing requirements, and paintability.
Tools and Materials You’ll Need
For a basic window-caulk replacement, gather:
- New window sealant
- Caulking gun
- Utility knife
- Putty knife or scraper
- Cleaning cloth
- Mild cleaner
- Painter’s tape
- Caulk finishing tool
- Gloves
- Safety glasses
You may also need a caulk-removal tool if the old sealant is particularly stubborn.
How to Replace Window Caulk in 7 Steps
Step 1: Inspect the Existing Caulk
Before touching the old sealant, inspect the entire joint.
Look for:
- Cracks
- Separation
- Gaps
- Mould
- Water staining
- Loose sections
- Damaged surrounding materials
Don’t assume the caulk is the cause of every window problem.
If condensation is the issue rather than rainwater intrusion, see How to Stop Condensation on Windows first.
Likewise, if the window itself isn’t closing correctly, a sealant replacement may not solve the problem. Our guide on How to Fix a Window That Won’t Close covers that issue separately.
Step 2: Remove the Old Caulk
This is probably the most important preparation step.
Use a utility knife to carefully score along both edges of the old caulk.
Then:
- Lift an edge.
- Pull away loose sections.
- Scrape remaining material.
- Remove stubborn residue carefully.
Be cautious around glass, painted surfaces, vinyl, and finished wood.
DAP recommends scoring old sealant and carefully scraping away the remaining material rather than simply applying new sealant over it.
Don’t Rush This Step
The cleaner the joint, the better your new seal has a chance of performing.
Step 3: Clean the Joint
Once the old caulk is gone, remove:
- Dust
- Dirt
- Grease
- Loose debris
- Old sealant residue
Use a suitable cleaner for the surface you’re working on.
Then allow the area to dry completely.
Never apply new exterior caulk onto a wet joint unless the specific product instructions explicitly allow it.
DAP’s sealant guidance stresses that the surface should be clean and dry for good adhesion.
Step 4: Protect the Edges With Painter’s Tape
Painter’s tape isn’t essential, but it can make your first few caulking jobs look much cleaner.
Apply tape:
- Along the window frame
- Along the adjoining trim or wall
- On both sides of the joint
Leave the actual gap exposed.
Don’t place the tape too far away from the joint because you’ll create an unnecessarily wide sealant line.
Remove the tape while the sealant is still workable rather than waiting until it has fully cured.
DAP recommends using painter’s tape for cleaner lines and removing it before the sealant skins over.
Step 5: Prepare the Caulk Cartridge
Cut the nozzle at approximately a 45-degree angle.
The opening should be roughly appropriate for the size of the joint.
Then:
- Load the cartridge into the caulking gun.
- Puncture the inner seal if required.
- Hold the gun at a consistent angle.
- Apply steady pressure.
Don’t make the nozzle opening excessively large.
A smaller opening gives you more control.
Step 6: Apply the New Caulk
Start at one end of the joint.
Move the caulking gun steadily while maintaining consistent pressure.
Your goal is a continuous bead rather than a series of small blobs.
Apply enough sealant to fill the joint without creating a huge mound.
For larger or deeper joints, the appropriate use of backer rod may be necessary rather than filling a deep void entirely with sealant. DAP’s guidance recommends backer rod for certain larger/deeper joints.
Pro Tip
It’s usually easier to apply slightly less sealant and add a little more than to create an oversized bead that becomes difficult to tool.
Step 7: Tool and Smooth the Bead
After applying the caulk, smooth the bead using:
- A caulk finishing tool
- A suitable smoothing method recommended by the manufacturer
Work before the sealant skins over.
Remove painter’s tape carefully if you used it.
The finished joint should look:
- Continuous
- Smooth
- Neat
- Fully bonded
- Free of obvious gaps
Then leave the sealant alone while it cures.
Don’t expose it to rain or water before the product’s stated cure or water-exposure time.
How to Replace Exterior Window Caulk
Exterior caulking needs extra attention because it is exposed to:
- Rain
- Sunlight
- Temperature changes
- Wind
- Freeze/thaw cycles in colder climates
Before resealing an exterior window:
- Inspect the entire perimeter.
- Remove failed sealant.
- Clean the joint.
- Let it dry.
- Choose an exterior-rated product.
- Apply a continuous bead.
- Tool the joint.
- Allow adequate curing time.
DAP’s exterior window-sealing guidance recommends removing old sealant, cleaning the joint, inspecting the gap, and applying an appropriate exterior sealant.
How to Replace Interior Window Caulk
Interior window trim is usually easier to work on.
The basic process is the same:
- Remove old caulk.
- Clean the surface.
- Let it dry.
- Apply new sealant.
- Smooth the bead.
- Remove tape.
- Allow it to cure.
If you’re sealing painted trim, make sure the product you choose is paintable if you plan to repaint the joint.
Some silicone products are not designed to be painted, so check the product instructions before purchasing.
Should You Caulk the Bottom of a Window?
Don’t automatically seal every part of the window perimeter.
Some windows are designed with drainage paths or weep openings that allow water to escape.
Sealing those openings can interfere with the window’s drainage system.
This is particularly important if you’re trying to solve a water leak.
If water is entering around the bottom of the window, read How to Fix Water Leaking Around a Window before applying sealant.
How Long Does Window Caulk Take to Dry?
Drying and curing are not always the same thing.
A sealant may become surface-dry relatively quickly but require significantly longer to fully cure.
The exact time depends on:
- Product type
- Temperature
- Humidity
- Joint size
- Surface
- Manufacturer’s instructions
For example, DAP technical documentation for certain products specifies different times for water exposure and full cure.
Always follow the instructions printed on the product you’re using.
Can You Caulk Windows in Cold Weather?
It depends on the specific sealant.
Some exterior products are designed to work across a broad temperature range, while others have stricter application requirements.
Before caulking during cold weather, check:
- Minimum application temperature
- Surface temperature requirements
- Rain exposure time
- Cure time
If the surface is wet, frozen, or covered with frost, postpone the job unless the product specifically allows those conditions.
Can You Caulk Windows in the Rain?
Generally, you should avoid applying ordinary exterior caulk to a wet joint unless the manufacturer specifically states that the product is suitable for wet conditions.
The surface usually needs to be clean and sufficiently dry for proper adhesion.
If rain is expected soon, check the product’s cure and weather-exposure requirements before starting.
What If the Gap Is Too Large for Caulk?
Don’t fill a very deep or wide opening with caulk alone.
Depending on the joint, a foam backer rod may be appropriate.
Backer rod helps control the depth of the sealant and can improve the performance of larger joints.
The correct size depends on the joint and product requirements.
If you’re looking at a large structural gap around a window, however, don’t automatically treat it as a caulking project. It may indicate a larger installation or building-envelope problem.
How Often Should Window Caulk Be Replaced?
There isn’t a universal replacement schedule.
Good-quality sealant can last for years, but its lifespan depends on:
- Product quality
- Climate
- Sun exposure
- Window movement
- Installation quality
- Material compatibility
Instead of replacing caulk according to a calendar, inspect it periodically.
If it remains flexible, bonded, and intact, there may be no reason to replace it.
Common Window-Caulking Mistakes
1. Applying New Caulk Over Old Caulk
This often produces a poor bond and an untidy finish.
Remove failed material first.
2. Caulking a Wet Surface
Moisture can interfere with adhesion.
3. Using the Wrong Sealant
Interior trim and exterior window joints may require different products.
4. Making the Bead Too Large
More caulk doesn’t necessarily mean a better seal.
5. Blocking Drainage Openings
Never seal designed weep holes without knowing how the window drains.
6. Ignoring the Actual Leak
If water is entering from damaged flashing or the wall above the window, caulking the visible interior joint won’t solve the source.
7. Painting Non-Paintable Silicone
Check the product label before painting.
What If the Window Is Still Leaking After Recaulking?
If the leak continues, stop adding more caulk.
Investigate:
- Flashing
- Siding
- Exterior trim
- Window installation
- Drainage
- Roof or gutter areas above the window
- Failed glazing
- Damaged framing
If the window itself is difficult to operate, check How to Fix a Window That Is Hard to Open.
A persistent leak usually means the problem is bigger than one failed sealant joint.
What If There’s Condensation Instead of a Leak?
This distinction matters.
If water appears mainly:
- On cold mornings
- On the room-facing glass
- Overnight
- During winter
you may be dealing with condensation rather than rainwater intrusion.
Our guide How to Stop Condensation on Windows covers ventilation, humidity, heating, and other solutions
Contractor’s Tip
Spend more time preparing the joint than applying the caulk.
A perfect-looking bead won’t last if it’s applied over dusty, wet, loose, or contaminated material.
Remove the failed sealant, clean the surface, let it dry, and then apply the correct product.
That’s what separates a temporary cosmetic fix from a proper window-maintenance job.
Final Thoughts
Replacing window caulk is a relatively simple DIY project, but the preparation matters more than most homeowners expect.
Start by identifying whether the problem is actually failed caulk. Then remove the old sealant, clean and dry the joint, choose a compatible product, and apply a neat continuous bead.
Don’t block drainage openings, don’t use the wrong sealant, and don’t assume caulk can repair a flashing or structural problem.
If your window is already leaking, start with How to Fix Water Leaking Around a Window before reaching for the caulking gun.
FAQs
How do I replace window caulk?
Remove the old caulk, clean and dry the joint, apply compatible new sealant, smooth the bead, and allow it to cure according to the manufacturer’s instructions.
Do I need to remove old window caulk?
Yes, if the existing caulk is cracked, loose, peeling, or failing. Applying new sealant over deteriorated material can result in a poor repair.
What is the best caulk for exterior windows?
Choose an exterior-rated sealant specifically suitable for windows and compatible with the materials around your window. Always check the manufacturer’s instructions.
Should I use silicone or acrylic caulk around windows?
Either can be appropriate depending on the application. Silicone often provides flexible water resistance, while paintable acrylic or hybrid products can be useful where painting is required.
Can I caulk over cracked caulk?
It’s better to remove failed caulk first, clean the joint, and then apply new sealant.
How long does window caulk last?
It depends on the product, climate, exposure, materials, and installation. Inspect the joint regularly rather than replacing it on a fixed schedule.
Can I caulk a window in winter?
Possibly, but only if the sealant’s application-temperature requirements allow it. Check the manufacturer’s instructions.
Can I caulk a window if it’s going to rain?
Avoid applying ordinary sealant to a wet surface or immediately before rain unless the specific product is designed for those conditions.
Should I caulk around the entire window?
Not necessarily. Some windows have drainage openings that must remain unobstructed. Follow the window manufacturer’s installation and drainage requirements.
Why is my window still leaking after I replaced the caulk?
The leak may originate from flashing, siding, trim, the wall above the window, drainage problems, or another building component rather than the caulk itself.