Introduction
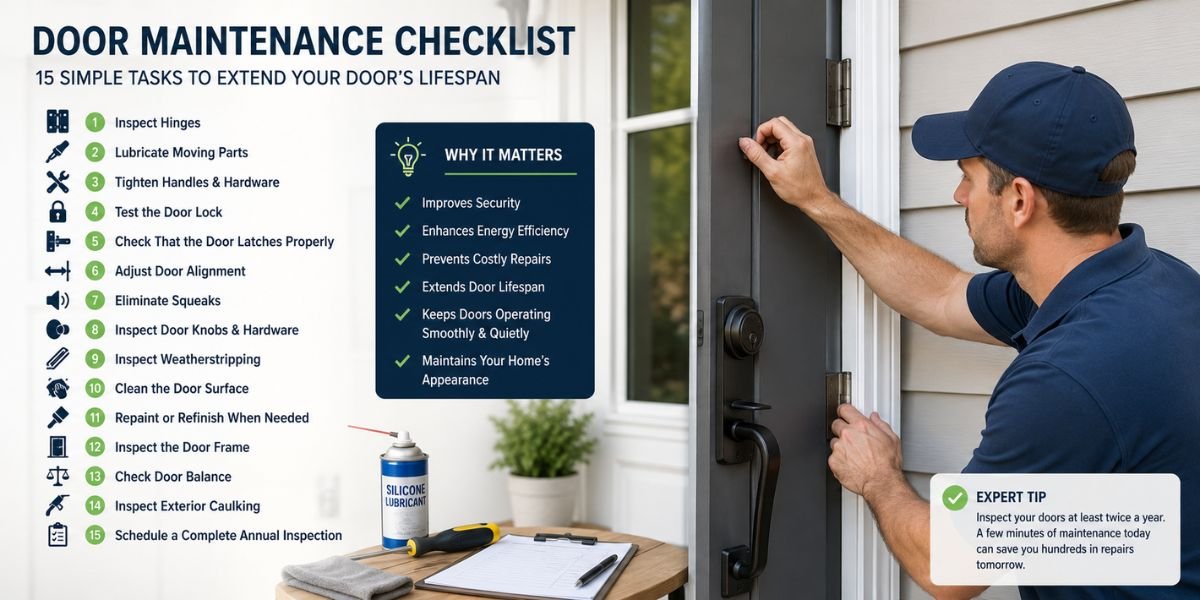
Your doors are some of the most frequently used features in your home, yet they’re often overlooked until something goes wrong. Squeaky hinges, sticking doors, loose handles, damaged frames, and worn weatherstripping usually start as small issues that become expensive repairs if ignored.
The good news is that most of these problems can be prevented with a simple maintenance routine. Spending just a few minutes inspecting and caring for your doors every few months helps improve security, energy efficiency, and long-term durability.
This checklist walks you through the essential maintenance tasks every homeowner should perform to keep interior and exterior doors operating smoothly throughout the year.
If your door already sticks instead of opening smoothly, repair it before starting routine maintenance. Our How to Fix a Door That Sticks guide explains the most common causes and solutions.
Quick Answer
A proper door maintenance checklist includes inspecting hinges, tightening hardware, lubricating moving parts, checking weatherstripping, cleaning the door, testing locks and latches, repairing damage early, and repainting or sealing the surface when necessary. Performing these tasks once or twice a year can significantly extend the life of your doors.
Why Regular Door Maintenance Matters
Routine maintenance helps you:
- Extend the lifespan of your doors.
- Prevent costly repairs.
- Improve home security.
- Reduce drafts and energy loss.
- Keep doors operating quietly.
- Maintain your home’s appearance.
Small maintenance tasks today can prevent major repairs tomorrow.
If your door frame shows signs of cracking, movement, or moisture damage, repair it before continuing with routine maintenance. Our How to Repair a Door Frame guide explains how to restore a solid, secure frame.
1. Inspect the Door Hinges
Check every hinge for:
- Rust
- Loose screws
- Bent hinge leaves
- Excessive wear
Tighten loose screws and replace damaged hinges before they affect the door’s alignment.
If your hinges are badly worn or damaged, replacing them is usually a better long-term solution than repeated adjustments. Follow our How to Replace Door Hinges guide for step-by-step instructions.
2. Lubricate Moving Parts
Apply lubricant to:
- Hinges
- Latches
- Lock mechanisms
Use products specifically designed for door hardware rather than household oils.
Choosing the correct lubricant reduces friction, prevents corrosion, and keeps your doors operating quietly. Read our Best Lubricant for Door Hinges guide to compare the best options.
3. Tighten Handles and Hardware
Inspect:
- Door knobs
- Handles
- Hinges
- Strike plates
- Decorative hardware
Loose hardware can eventually affect both security and everyday operation.
If tightening the screws doesn’t solve the problem, our How to Fix a Loose Door Handle guide explains how to repair worn hardware and restore smooth operation.
4. Test the Door Lock
Open and close the lock several times.
Check that:
- The key turns smoothly.
- The latch retracts fully.
- The deadbolt locks securely.
- No grinding or sticking occurs.
A lock that sticks or fails to engage properly should be repaired as soon as possible. Our How to Fix a Door Lock guide covers the most common lock problems and practical DIY solutions.
5. Check That the Door Latches Properly
Open and close the door several times to make sure the latch engages smoothly with the strike plate.
Look for:
- A loose strike plate
- Misaligned latch
- Sticking latch bolt
- Gaps between the door and frame
Fixing minor latch problems early helps prevent unnecessary wear on the lock and hinges.
If the latch doesn’t engage correctly, don’t assume the door needs replacing. Our How to Fix a Door That Won’t Latch guide explains how to adjust the strike plate, hinges, and latch for smooth operation
6. Adjust Door Alignment
Doors naturally shift over time due to seasonal humidity, settling foundations, and daily use.
Signs of poor alignment include:
- Uneven gaps
- Rubbing against the frame
- Difficult opening or closing
- Latch misalignment
Inspect the hinges and frame before the problem becomes worse.
Small alignment issues can often be corrected in just a few minutes without replacing any hardware. Follow our How to Adjust Door Hinges guide for step-by-step instructions.
7. Eliminate Squeaks Immediately
A squeaky door usually indicates friction between moving metal parts.
Common causes include:
- Dry hinges
- Dirt buildup
- Rust
- Worn hinge pins
Address squeaks as soon as they appear to reduce long-term wear.
Persistent squeaks are usually easy to fix with the right maintenance techniques. Our How to Stop Doors From Squeaking guide explains how to clean, lubricate, and maintain hinges for quiet operation.
8. Inspect Door Knobs and Hardware
Door knobs experience daily wear and should be checked regularly.
Inspect for:
- Loose screws
- Worn finishes
- Stiff operation
- Cracked components
Replacing worn hardware improves both appearance and functionality.
If your existing knob is outdated or damaged, replacing it is a simple DIY project. Our How to Replace a Door Knob guide walks you through the installation process.
9. Inspect Weatherstripping
Exterior doors rely on weatherstripping to block drafts, moisture, insects, and dust.
Check for:
- Cracks
- Tears
- Compression
- Missing sections
Replace worn weatherstripping as needed to maintain energy efficiency.
Worn weatherstripping is one of the most common causes of drafts around exterior doors. Our How to Weatherproof a Door guide explains how to replace seals and improve your home’s energy efficiency.
Properly sealing air leaks around doors can improve indoor comfort and reduce heating and cooling costs. The U.S. Department of Energy recommends maintaining weatherstripping and sealing gaps as part of a home’s regular energy-efficiency routine.
10. Clean the Door Surface
Dust, grease, and moisture gradually affect the appearance and finish of your doors.
Use:
- Mild soap
- Soft microfiber cloth
- Non-abrasive cleaner
- Warm water
Avoid harsh chemicals that can damage paint, wood, or protective coatings.
Different doors require different levels of care depending on where they’re installed. Our Interior Door vs Exterior Door guide explains how maintenance requirements vary between indoor and outdoor doors.
Seasonal Maintenance Tips
Spring
- Inspect weather damage.
- Clean accumulated dirt.
- Lubricate hinges.
Summer
- Check for swelling caused by humidity.
- Inspect paint and finishes.
Autumn
- Replace worn weatherstripping.
- Seal gaps before winter.
Winter
- Remove moisture buildup.
- Monitor drafts around exterior doors.
Following a seasonal maintenance routine keeps your doors operating efficiently throughout the year.
Expert Tip
Create a simple maintenance schedule and inspect every door in your home at least twice a year. Preventive maintenance takes only a few minutes but can help you avoid expensive repairs and extend the life of your doors.
11. Repaint or Refinish When Needed
Paint and protective finishes wear down over time, especially on frequently used doors.
Signs it’s time to repaint include:
- Peeling paint
- Fading color
- Scratches
- Chipping
- Water stains
Refreshing the finish protects the surface and keeps your doors looking new.
If you’re ready to refresh the appearance of an older interior door, our How to Paint an Interior Door guide explains every step—from preparation and priming to achieving a smooth, professional-quality finish.
12. Inspect the Door Frame
Check the frame for:
- Cracks
- Water damage
- Loose trim
- Rot
- Gaps around the frame
Early repairs help prevent more serious structural problems.
13. Check Door Balance
Open the door halfway and let go carefully.
A properly balanced door should remain in place.
If it swings open or closed on its own, inspect the hinges, frame, and alignment.
14. Inspect Exterior Caulking
For exterior doors, examine the caulk around the frame.
Replace cracked or missing caulk to help prevent:
- Water intrusion
- Air leaks
- Insect entry
- Energy loss
15. Schedule a Complete Annual Inspection
Once each year, inspect every part of the door system.
Review:
- Hinges
- Locks
- Handles
- Latches
- Weatherstripping
- Paint
- Frame
- Threshold
- Trim
Keeping a yearly checklist helps identify small problems before they become costly repairs.
If you’re replacing an aging door during your annual inspection, installing a complete prehung unit can save time and improve long-term performance. Our How to Install a Prehung Door guide explains the entire installation process from start to finish.
Annual Door Maintenance Checklist
| Task | Frequency |
|---|---|
| Inspect Hinges | Every 6 Months |
| Lubricate Hinges | Every 6–12 Months |
| Tighten Hardware | Every 6 Months |
| Test Lock & Latch | Every 6 Months |
| Check Weatherstripping | Twice Per Year |
| Clean Door Surface | Monthly |
| Inspect Frame | Annually |
| Repaint/Refinish | Every 5–8 Years (or as needed) |
Final Thoughts
A simple door maintenance routine can significantly extend the life of your doors while improving security, energy efficiency, and everyday performance. By inspecting hinges, locks, weatherstripping, hardware, and finishes throughout the year, you can prevent many of the most common door problems before they become expensive repairs.
Whether your doors are brand new or several years old, consistent maintenance is one of the easiest ways to protect your investment and keep your home looking its best.
FAQs
How often should I maintain my doors?
Most doors should be inspected every six months, with a more detailed maintenance check performed once a year.
What’s the most common door maintenance task?
Lubricating hinges, tightening hardware, and checking the latch are the most common and easiest maintenance tasks.
Can regular maintenance prevent expensive repairs?
Yes. Catching loose hardware, worn weatherstripping, or alignment issues early can prevent larger repairs and extend the life of your door.
Should interior and exterior doors be maintained differently?
Yes. Exterior doors require additional attention because they are exposed to changing weather, moisture, and UV rays.